


Until the invention of our patented Hydro Vortex™ backwashable waterfall filter, there was no such pond concept as a "Hybrid Pond". There was only two pond types: a koi pond, or a water garden pond. Koi ponds are a much safer, and healthier way to raise koi - but they are not natural looking in the landscape - they tend to be more formal. Water garden ponds look more natural in the landscape, but aren't the best choice for raising koi. See more pond styles here:
Koi ponds always featured a backwashable filter. Water garden ponds did not. The Hydro Vortex™ backwashable waterfall filter changed all that. Here at Russell Watergardens we are always creating new ways of doing things. Koi ponds are better for koi, but water garden ponds look more natural in the landscape. So what did we do? We put some peanut butter in the chocolate - or vise versa!
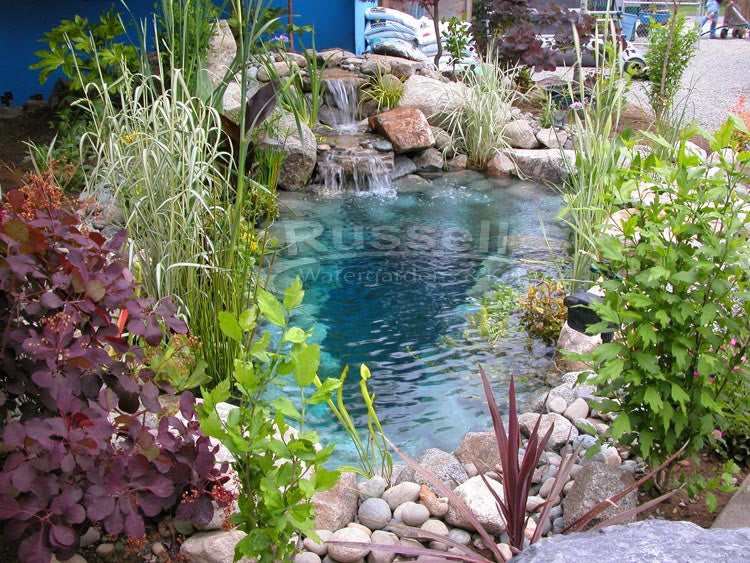
Since our Hydro Vortex™ waterfall filter is backwashable, why not make a pond that is part koi pond and part water garden pond? This is how we created the Hybrid Pond concept.
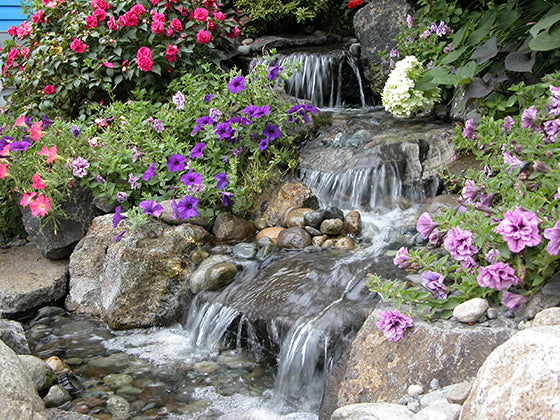
A Hybrid Pond is more natural looking than a koi pond and safer for koi and easier to clean and maintain than a water garden pond.

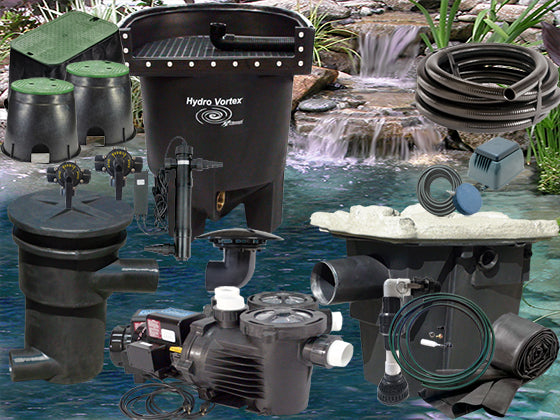
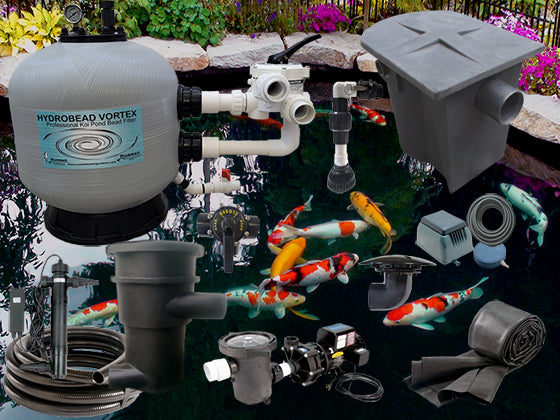
A Hybrid Pond consists of:
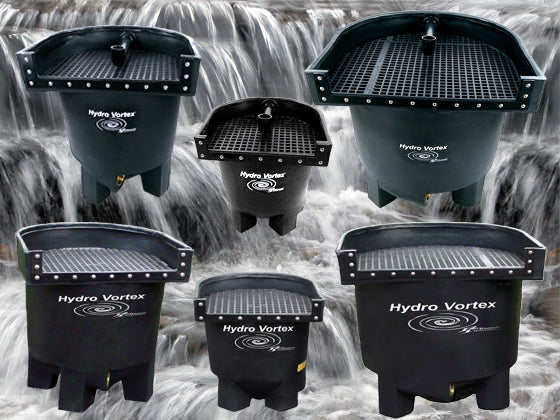
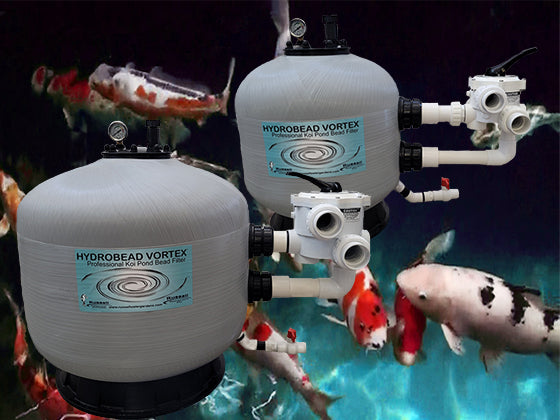
- A backwashable filter
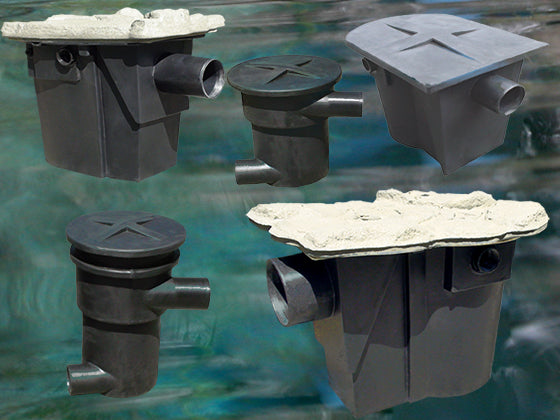
- A pond skimmer
- A bottom drain
- A bottom drain pre-filter
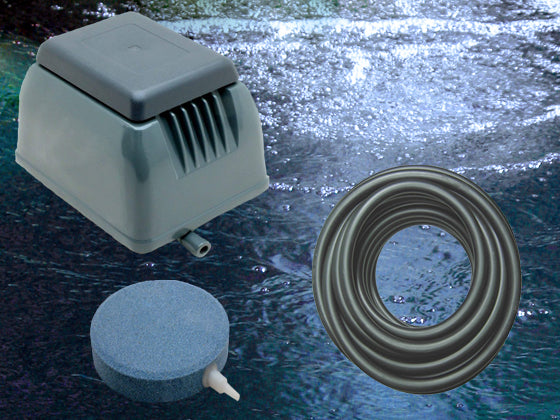
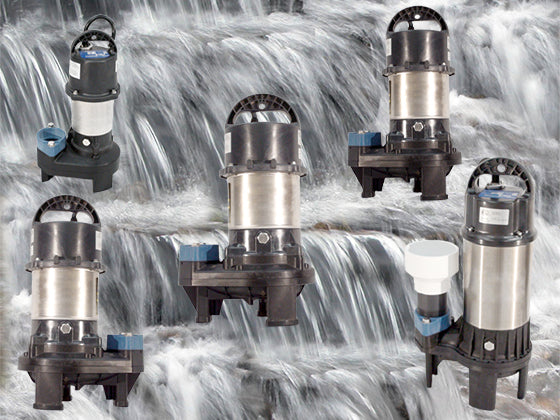
- An aeration system
- A UV clarifier
- No gravel in the pond
- Bare liner on all horizontal surfaces
- Boulders
- Waterfalls
- Aquatic plants in baskets
- Minimum 3' depth
- Proper circulation
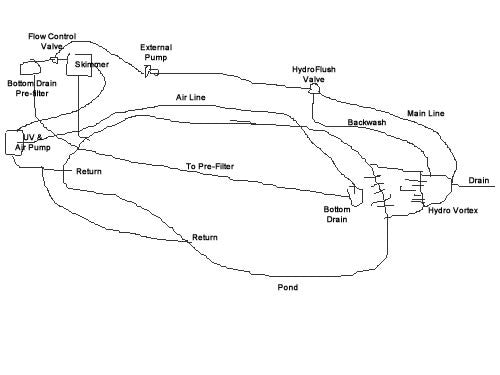
The first step in learning how to build a Hybrid Pond is to create a rough sketch drawing of the pond you are envisioning. If you need help, simply give us a call or an email – we’re here to help you. You’ll be able to make as many changes to your pond drawing as you wish. This is the sketch for the Hybrid Pond we are about to build. As you can see, the drawing is very basic. Once you’re fairly satisfied with the pond drawing, it’s time for the next step.

The next step is to paint your Hybrid Pond design on the ground in actual size. Having it painted on the ground gives you a much better idea of what you are creating.
Using your drawing as your guide, first paint the pond. Then paint where the Hydro Vortex™ waterfall filter will be installed. Then at the other end of your design, paint where the HydroSieve™ pre-filter and the HydroClean™ pond skimmer will be installed.
With the pond drawing now in “actual” size now, measure the length and width of your design from one end to the other. These measurements will tell you what size pondless waterfall kit you'll need. If we don't have a stock kit in your size, we'll happily create a custom kit for you - just give us a call or an email.

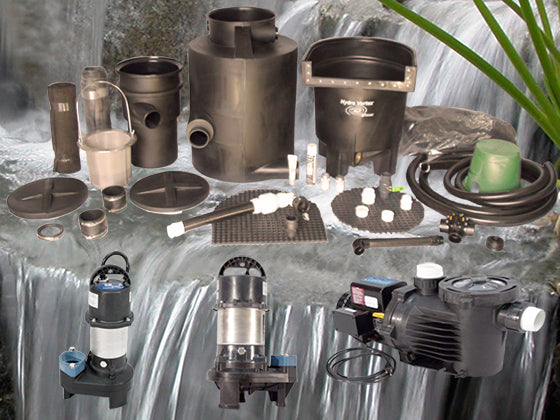
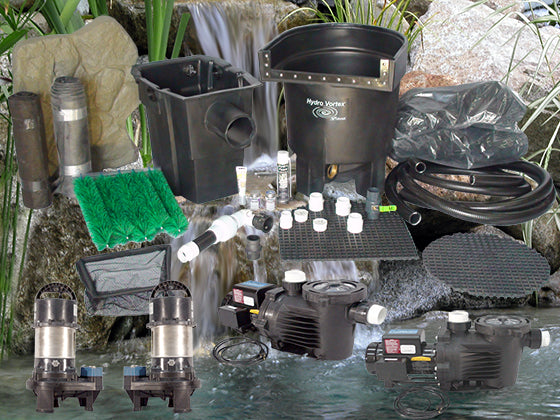
With your Hybrid Pond kit on site - you're ready to start. For this particular Hybrid Pond - we're using an Ahi Series Hybrid pond kit.
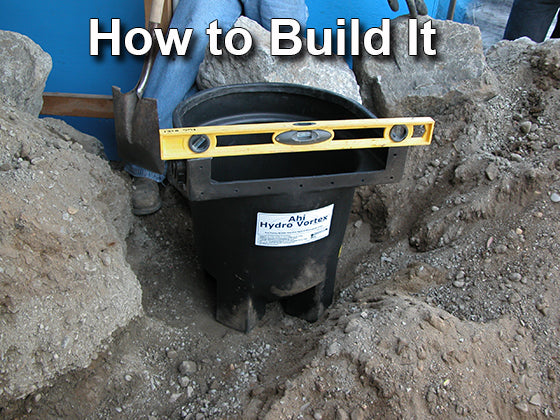
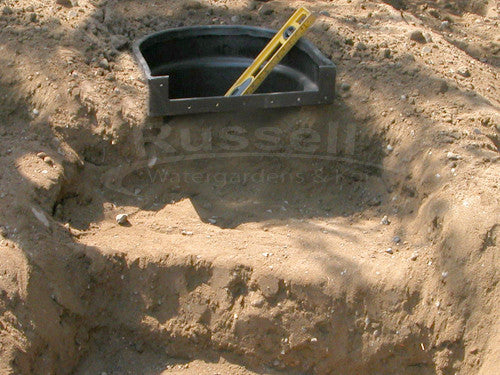
The first step is to create a level and firm are for the Hydro Vortex™ filter. Once the ground under the filter is firm and level you're ready to proceed with hooking up it's plumbing lines.
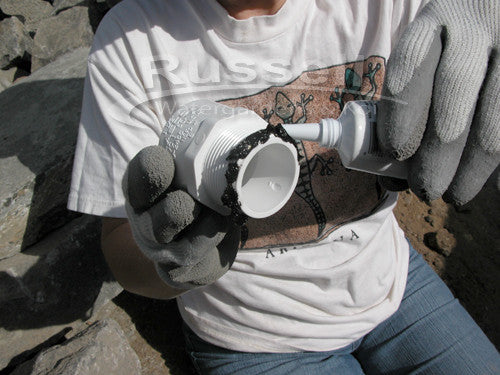
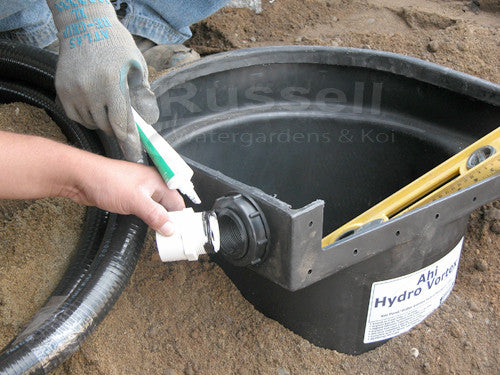
Your Hydro Vortex™ filter comes complete with all fittings and a tube of silicone sealant. The first step is to place a bead of silicone around the threads of both the inlet and drain pipe adaptors. (The Ahi Hydro Vortex™ filter has one inlet and one drain - the Marlin and Dolphin filters have two inlets and a drain. A plug comes with the larger filters to plug the unused inlet.)
Hand tighten the siliconed male pipe adaptors into both the brass inlet port and the drain port of the Hydro Vortex™ filter. The drain port is located at the middle and bottom of the settling cone. The inlet is located above the drain port and off to the side of the filter.
You only need to "hand-tighten" these male pipe adaptors - no need to use a large wrench. Once you've tightened the fittings as much as you can with just your hand - that's enough. The silicone on the threads will prevent any possible leaking.

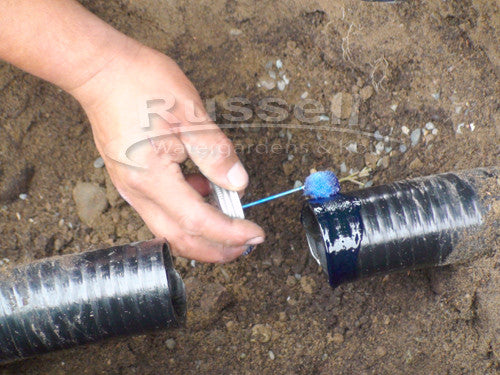
Your kit will include both Red Hot PVC primer and PVC glue.
Prepare the insides of the male pipe adaptors with a light coating of the PVC primer. Prepare the outside ends of the flexible PVC pipe with a light coating of PVC primer.
After a few seconds, the primer will dry. Once the primer is dry, apply the PVC glue to the end of the flexible PVC pipe. Makes sure to go all the way around the pipe - leave no gaps in the glue. No need to apply glue to the insides of the pipe adaptors - only the outside of the pipe. With PVC glue only on the pipe, this will force extra glue out along the pipe - and not into the inside of the filter.
The Hydro Vortex™ filter comes with with 10' of 1½" flexible PVC pipe for the draining of the filter.
Apply PVC glue to the end of the drain pipe and insert it into the primed male pipe adaptor in the drain port of the filter. Give the pipe a slight "twisting" action as you're inserting the pipe. Hold the pipe in place for at least 30 seconds.
Repeat the process with the inlet pipe.

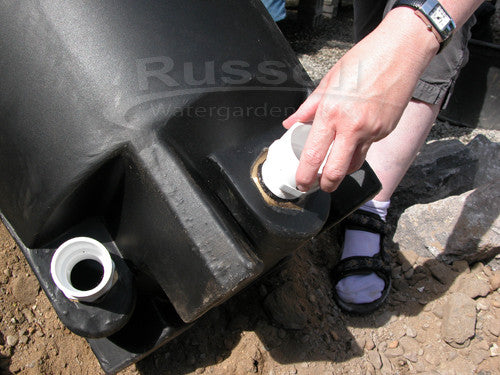
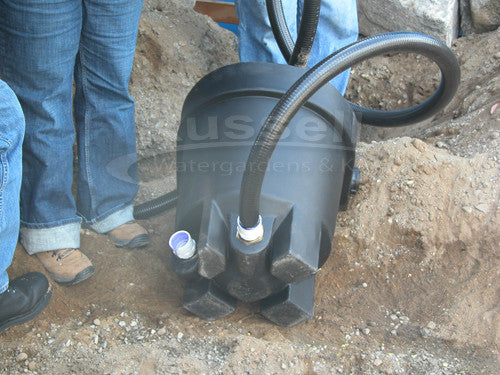
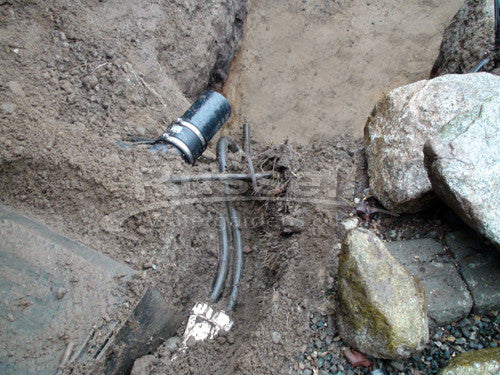
Upright the Hydro Vortex™ onto your previously prepared firm, level surface. Make sure the drain pipe is underneath the inlet mainline pipe.
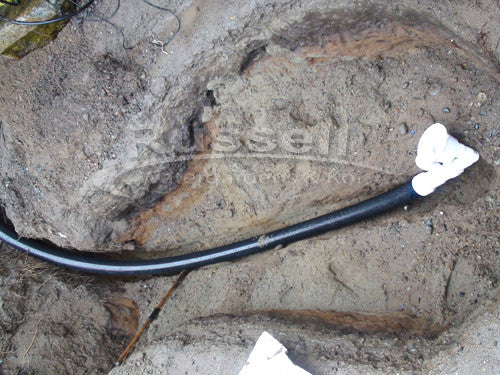
Extend the drain pipe away from the filter to a designated area. Extend the inlet - or mainline pipe down one side of your pond to the spot where the pond skimmer will be located.

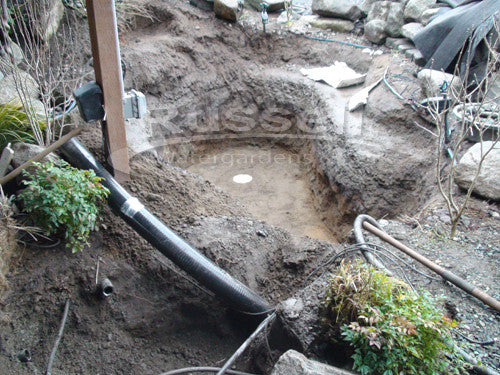
You will reuse the soil excavated for the pond to bury the pipes, backfill around the Hydro Vortex™ waterfall filter, and to create a landscape planting berm around the waterfalls.
The trench down the middle of the pond is for the 4" bottom drain pipe. The trench around the right side of the pond is for the main line pipe.
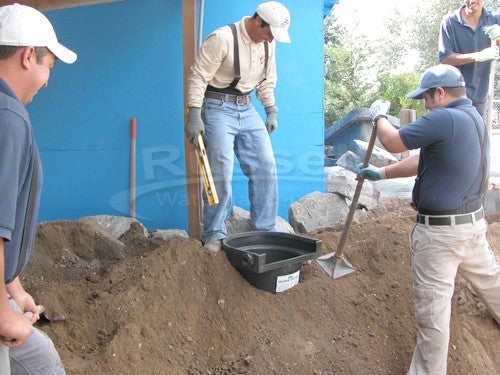
Make sure to compact the soil as you go. This will prevent it from settling in the future.
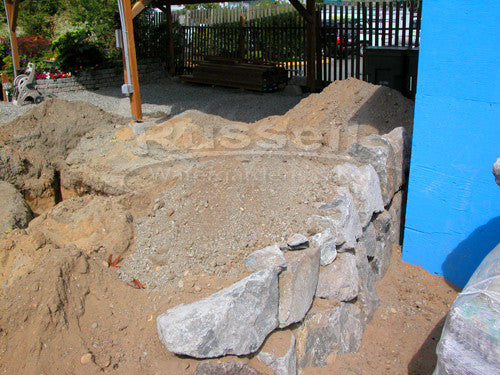
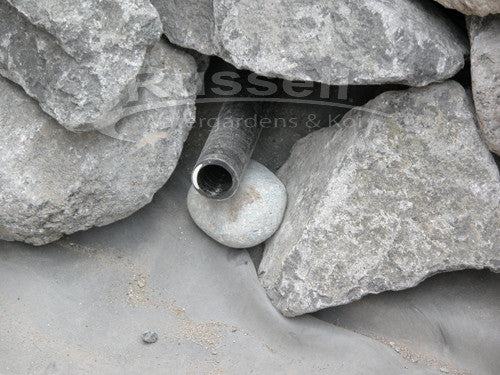
You will be excavating quite a bit of dirt. If you have limited space behind the Hydro Vortex™ waterfall filter, build a curved retaining wall to contain the soil around the filter. We used rock in force this installation, but you can use any material you choose. If you don't have experience in building rock retaining walls, you can use retaining wall blocks that are available at any home improvement warehouse store.
Make sure to leave room for the filter's drain pipe and valve.
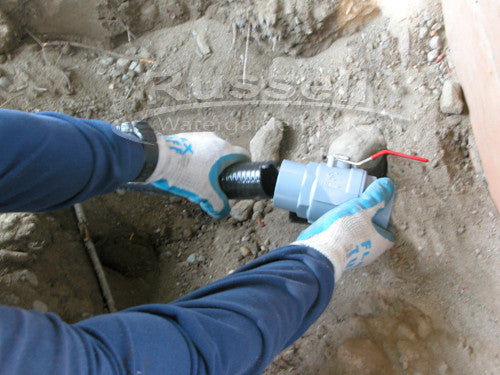
Extend the filter drain pipe out past the retaining wall. Using the PVC primer, clean the end of the drain pipe, and the inside of one end of the lever valve. When dry, apply glue to the pipe only - then insert into the valve. Hold for 30 seconds.
This lever valve is designed to be installed on it's side. When the valve is closed the lever points skyward. When the drain is open, the lever is pointing in the direction of the water flow. This way, to open the valve, you will push the lever forward and down. To close the valve, you will pull the lever up and back. This lever valve is much easier to open and close than twisting a traditional ball valve.
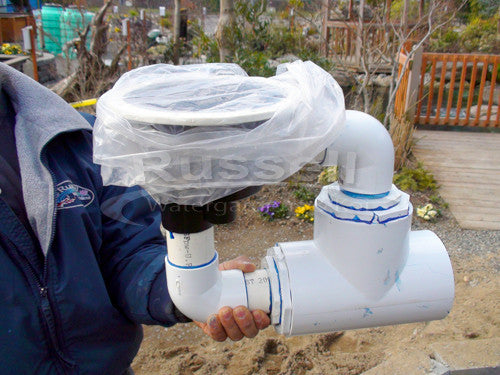
Installing the HydroFlush™ Self-Cleaning Backwash System
The HydroFlush Self-Cleaning Backwash System consists of a 3-way valve with valve box, pipe, a bulkhead fitting, and backwash froth jet. Here is how to install it:
- Locate an accessible area of the main line pipe
- Cut a 3" section out of the pipe
- Glue in the 3-way valve in line with the main line (like we taught you with the fittings ... primer all connection points, apply glue only to the the pipe, insert into the female section with a twisting motion, hold for 30 seconds)
- Glue the HydroFlush™ pipe into the side of the 3-way as mentioned above
- Attach the HydroFlush™ white male pipe adaptor to the outside of the backwash bulkhead fitting at the top of the Hydro Vortex™ filter. (This photo shows it on the side, current generations have it in the middle back of the filter)
- Glue the HydroFlush™ backwash pipe into the white bulkhead at the top outside of the Hydro Vortex™ filter
- Attach the HydroFlush™ froth jet on the inside of the upper bulkhead

Glue the HydroFlush™ backwash pipe into the side outlet port of the 3-way valve. Place the valve and the pipes inside the include round valve box. Modifying the valve box with cutouts is recommended to fit over the three pipes. This is easy to do with an ordinary hacksaw. Cut lines in the the valve box on either side where the pipes will be - then simply "break-out" the piece.
Attach the male pipe adaptor to the backwash port at the top of the Hydro Vortex™ filter. (Silicone the threads and hand tighten) Then glue the HydroFlush™ backwash pipe into the male pipe adaptor. (Prime the inside of the pipe adaptor and the outside of the pipe - apply glue to the pipe, insert pipe into the pipe adaptor with a twisting motion and hold for 30 seconds.)

The HydroFlush™ valve will be located within 15' of the Hydro Vortex™ filter - because that is the length of backwash pipe that is included with your kit. If you need to install the HydroFlush™ valve farther away from the Hydro Vortex™ filter - let us know and we'll customize your kit for you.
You are now ready to create you waterfall "stair steps". For this Hybrid Pond we're using an Ahi Series Hybrid Pond kit. The Ahi creates a waterfall height of 19½" by itself when on flat ground. So we're creating two waterfalls by building one stair step with soil from the pond excavation. The first waterfall will fall directly from the Ahi. The second waterfall will fall directly into the pond.
Make sure to compact the soil more than you think is necessary! This will prevent future settling. You will be placing a lot of weight in rock, gravel, plants, and water over this area. Settling is a leading cause of leaks!
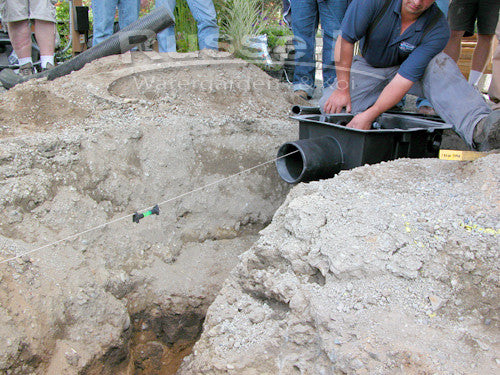
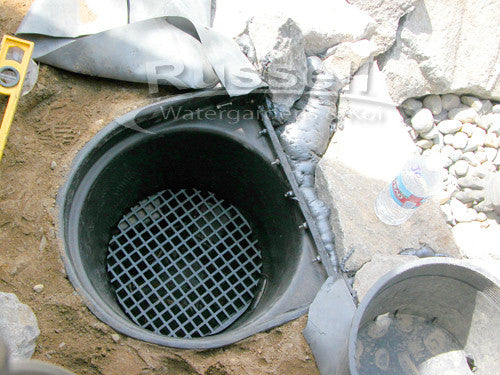
You're now ready to install the bottom drain basin and the pipe that will connect it to the HydroSieve™ pre-filter.
Here's a useful tip: Place a plastic bag over the opening of your bottom drain - hold it there with a rubber band. This way, when you backfill around the drain with soil - soil won't get down inside the drain!
We'll show you when to remove the plastic later.
!! Important !!
When installing a bottom drain - it is best to use 4" PVC pipe. An external pump will pull water out of the HydroSieve™ pre-filter, and gravity will push water into the HydroSieve™. If you use pipe smaller than 4", the pump may pull water out of the HydroSieve™ faster than gravity can keep up with the flow. Using 4" pipe ensures that water will flow properly to the HydroSieve™.
We're using flexible PVC pipe so we can curve it with limited fittings. This also ensures proper water flow. From the drain to the HydroSieve™ with one piece of pipe and just one 90° elbow at the HydroSieve™ pre-filter.

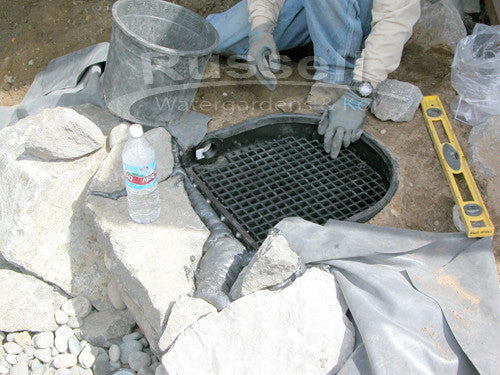
Compact soil on top of and around the bottom drain and pipe. Grade the bottom of the pond so that all directions slope towards the bottom drain. This pond is 16' long, the bottom drain is located at one end. The depth at the drain is 3' 6", the depth at the "shallow" end is 3'. We have 6" of slope from one end of the pond to the other.
The Hybrid Pond design places the bottom drain with submerged aeration underneath the waterfalls. This note only increases water circulation, the waterfalls will "disguise" the bubbles from the aeration system.
If you notice in this photo, the drain is not "all the way" to the end of the pond. This is to accommodate the rock wall we will be building after we install the pond liner.
Extend the 4" pipe to where you will be installing the HydroSieve pre-filter. Compact the soil over the pipe.
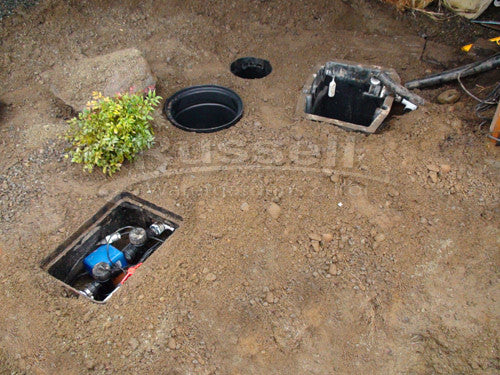
Begin excavating the area that will house the pre-filter, the pond skimmer, a flow control valve, the UV system, and air pump.
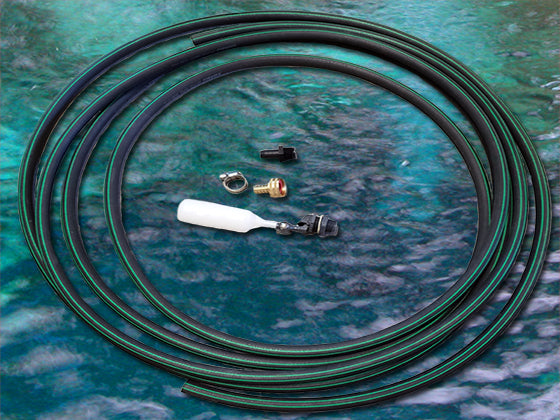
The outlet ports of the HydroClean™ pond skimmer will be set at your pond's water line. We will be using all three outlet ports of the skimmer and the Auto Fill Valve port.
To set the water line - using ground paint - paint a dash on the side of the pond about 6" below the top edge of the wall of the pond. Then using a string level stretched across the pond in multiple points - paint more dashes. Lastly, stretch the string level into the area excavated for the pond skimmer and paint one more dash. Now simply align the bottom edge of one of the HydroClean™ pond skimmer outlet ports to your painted dash.
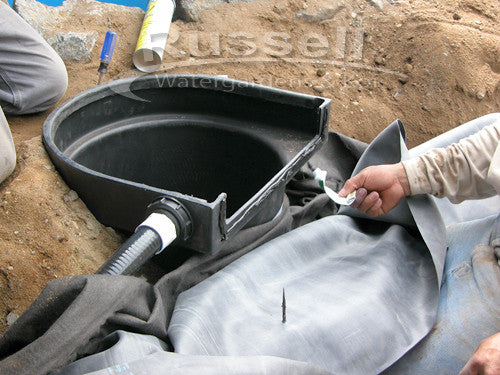
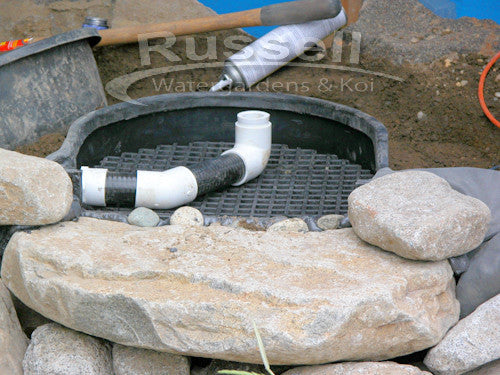
Install the HydroSieve™ pre-filter level with the HydroClean™ pond skimmer. Attach the 4" bottom drain pipe to the upper pipe nipple of the HydroSieve™.
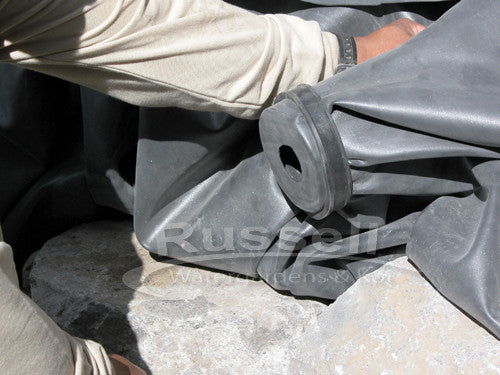
Attach the remote installation pipe to the HydroClean pond skimmer. Wipe the skimmer inlet pipe clean - then place a solid bead of silicone completely around the entire inlet pipe. Slide the rubber couple onto the inlet pipe while twisting. Turn the stainless steel collar so that the net is facing skyward then tighten the nut to lock the coupler to the skimmer.
Apply a solid bead of silicone around the remote installation pipe and insert it into the open end of the rubber coupler you just attached to the skimmer. Twist the collar so the nut is up and tighten. In this case, we also glued a 90° elbow on the end of the pipe nearest the pond. We will glue a short section of pipe into the elbow for easy liner attachment. Level the remote installation pipe.
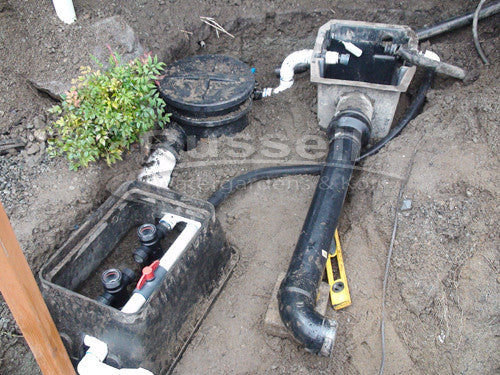
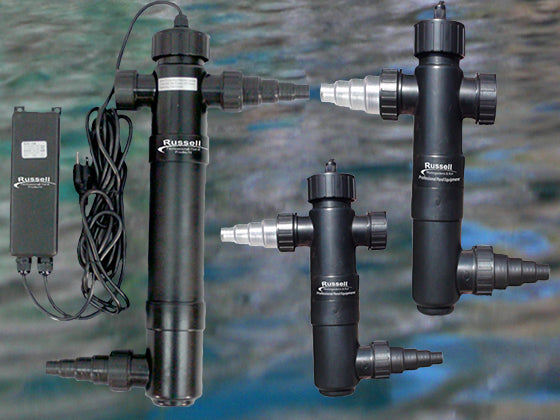
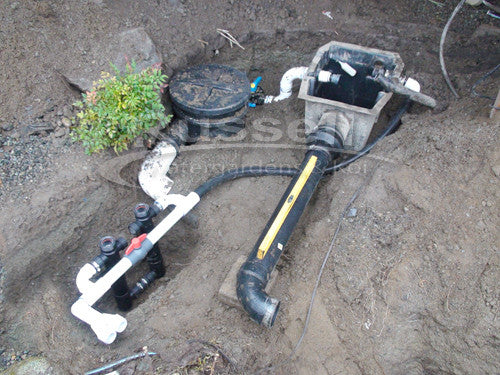
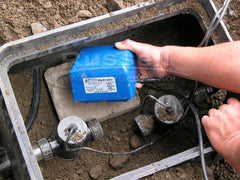
We also installed our UV clarifiers. We place them vertically in the ground for easy future bulb replacement. We also place a ball valve in parallel to the UV's to "dial-in" the perfect flow through the UV's. We install a valve box over the UV's and this is also where we'll be installing the air pump.
One of the skimmer outlet ports in connected to the UV's. One outlet port is connected to a Flow Control Valve that is also connected to the pre-filter, and the third outlet port is for overflow. The Auto Fill Valve float is installed.
We use the UV system returns to increase circulation in the pond. This particular pond design has a long narrow end connected to a larger roundish section. We are splitting the UV outlet into two pipes. One pipe will enter at the bottom of the pond in the narrow end to push debris across the bottom of the pond towards the bottom drain. The second pipe will be at the round section to create a whirling current to aid in settling debris towards the bottom drain and the skimmer.
There are two ways you can add the UV circulation returns. You can run them over the liner and down behind the rocks. Or you can penetrate the liner with a rubber collar. In this case, we ran both UV circulation returns over the liner and down behind the rock wall.

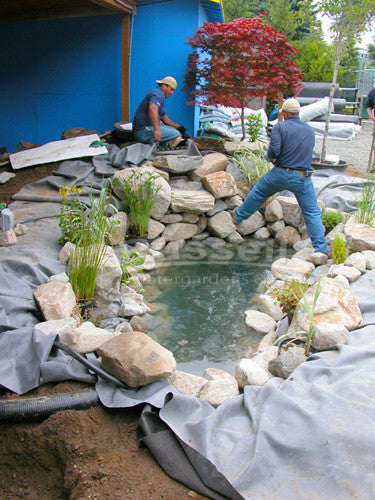
Time to install the underlayment. Underlayment does not hold the water - so it can be cut to fit. Makes sure to cover all horizontal and vertical surfaces of the pond with underlayment. The underlayment protect and cushions the rubber pond liner.
Using your hands to "feel" where the bottom drain is - cut the underlayment out around the drain. Do not take the plastic off the bottom drain yet. Flatten large wrinkles.
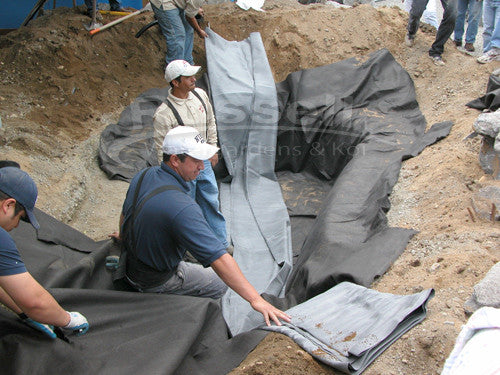
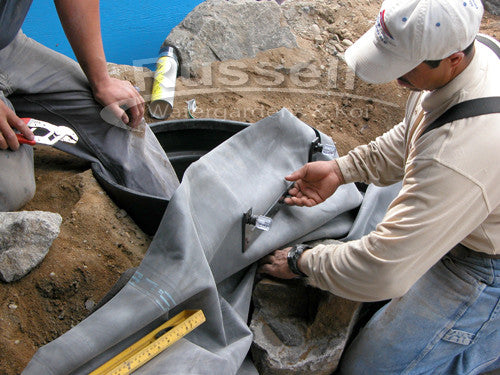
With the underlayment in place, you're now ready to install the rubber pond liner. The pond liner does hold the water - so the pond gets be lined with one solid piece. The pond liner should be extend past all sides of the pond by at least one foot. Flatten large wrinkles.
Leave a little slack in the liner at the base of all vertical walls to provide extra liner for the inevitable settling that occurs. As much as you've compacted the soil, the weight of the water in the pond will still compress the soil even more.

Install the Bottom Drain and Air Diffuser
*** Please note that we are installing a previous version of our bottom drain as we built this pond back in 2007. Our current bottom drain model looks different, but gets installed the same way. ***
- Using you hands - "feel" where the bottom drain is located and flatten the liner
- Align the bottom drain collar with the edges of the drain basin below the liner
- Using a razor knife, cut an "X" in the liner in the center of the collar
- Lift the edges of the "X" and pull the plastic bag off of the drain basin
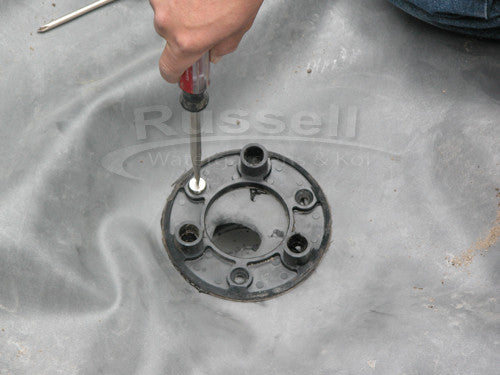
- With the edges of the "X" still lifted, apply a liberal amount of silicone in a solid bead around the upper perimeter of the drain basin - make sure to the silicone bead covers each of the screw holes
- Press the liner back down on to the drain basin and "squish" the silicone
- Using a finger to "feel" on of the drain basin screw holes
- Use an awl to poke a hole through the liner and into the screw hole
- Align the drain collar over the drain basin with a screw hole over the hole you just poked
- Install a collar screw through the collar, liner, and into the drain basin !!! DO NOT FULLY TIGHTEN SCREW YET !!!
- Repeat the process for each screw of the drain collar
- After all the screws are installed you may tighten them down !!! HAND TIGHTEN ONLY - DO NOT OVERTIGHTEN WITH A POWER DRILL AS CRACKING OF THE DRAIN BASIN OR COLLAR MAY OCCUR !!!
- Attach the drain lid (or grate on our current bottom drain models)
- You're done!
Attach the Pond Liner to the HydroClean™ Pond Skimmer Remote Installation Pipe
- Pull the pond liner over the skimmer remote installation pipe
- Push the rubber collar onto the pipe and over the liner
- Fold liner over the collar towards the pond to expose the remote installation pipe
- Apply a solid bead of silicone all the way around the pipe where next to the folded over liner
- Fold liner back over the remote installation pipe
- Cut a hole in the liner in the center of the pipe 1/2 the diameter of the pipe (6" pipe cut a 3" hole, 4" pipe cut a 2" hole, 3" pipe cut a 1½" hole, etc.)
- Pull/push the collar and liner over the pipe so that the liner stretches over the pipe
- Leave enough pipe sticking through the liner to support rocks in a later stage of building this pond
- Install the stainless steel locking collar and tighten the nut
- You're done!
 The liner stretched over the pipe becomes it's own water tight gasket between the pipe and the rubber collar.
Ingenious! We know!
Only HydroClean™ pond skimmers can be attach to pipe for installation away from the pond for a more natural looking pond. Nothing ruins the look of a pond than a pond skimmer sitting right on the edge of the pond.
HydroClean™ pond skimmers are the only pond skimmers that get attached to pond liner with just one nut!
You're welcome. Boom, boom. (The sound of dropped microphone)
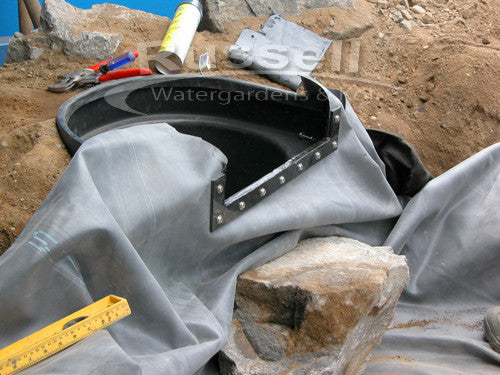
Attach Liner to the Hydro Vortex™ Waterfall Filter

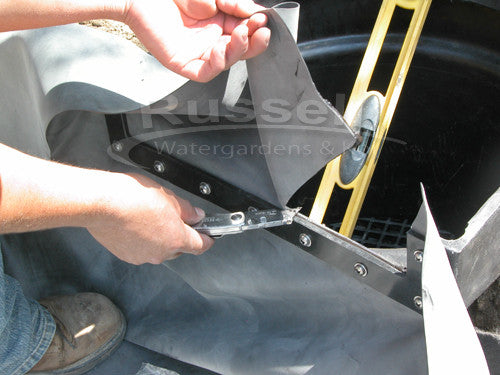
Flatten the liner up the face of the Hydro Vortex filter. Just like in the pond, leave some slack in the liner where vertical meets horizontal. Align the liner gasket flange on the "U" shape waterfall outlet of the filter. Using two awls, or two Phillips head screwdrivers - poke through the upper left and upper right screw holes of the liner gasket flange, liner, and through the corresponding filter screw holes.
Pull the liner, gasket flange, and awls as one piece back away from the filter. Use the PVC primer included with your kit to clean the "U" face of the filter, and the side of the liner that will touch the filter inside the gasket flange.
Once the primer has dried on both the filter and the liner apply a solid bead of silicone across the entire "U" outlet of the filter. Make sure there are no gaps in the silicone. Make sure the bead of silicone runs the the middle of each one of the filter's screw holes.
Lift the liner, gasket flange, and awls up to the filter as one unit. Align the awls in the gasket flange with the upper left and upper right screw holes and insert them into the screw holes. Press the gasket flange to the filter from the center outward left and right to spread the silicone.

While holding the liner gasket in place, remove one of the awls. Place a wash on a screw and insert it through the gasket flange and liner where you just removed the awl. The screws, washers, and nuts included with your Hydro Vortex™ filter are 316 stainless steel for superior corrosion resistance. Low cost filter come with aluminum screws that corrode and leak over time. (A common theme to our web site is: "You get what you pay for!")
Remove the other awl and repeat the process. Then, use an awl to poke holes through the remaining liner gasket flange screw holes. Insert screws with washers through the remaining screw holes.
After all the screws are insert through the gasket flange, liner, and filter screw holes - you can now attach the nuts. Don't tighten the nuts until all nuts are attached. When each screw has a nut, then go ahead and tighten them up.
After each of the screws/nuts are tightened, it's time to cut the liner out of the "U". Using the filter "U" as your guide, cut the "U" out with a razor knife.
!!! Do NOT cut off the excess liner from either side of the filter yet !!!
We only cut off excess liner after the pond is full of water and the pump is running. This way we won't be able to cut the liner to short!
Wipe off excess silicone that squished out while tightening the screws.
You're done!
Now we begin rocking the pond.
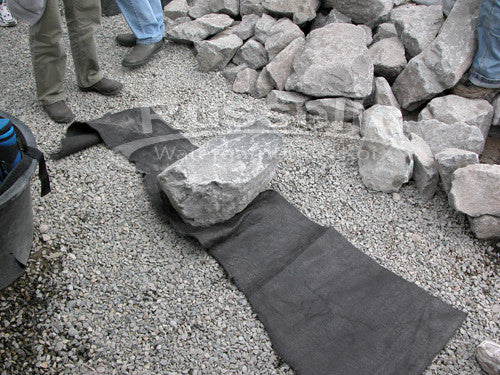
!!! Helpfull Back Saving Tip !!!
Using a strip of extra underlayment, lay it down flat on the ground. Roll a rock that is too heavy to pick for one person to lift onto the middle of the underlayment.
Using two people, grab the corners of the underlayment and lift the rock up! The underlayment becomes a rock carrying sling!
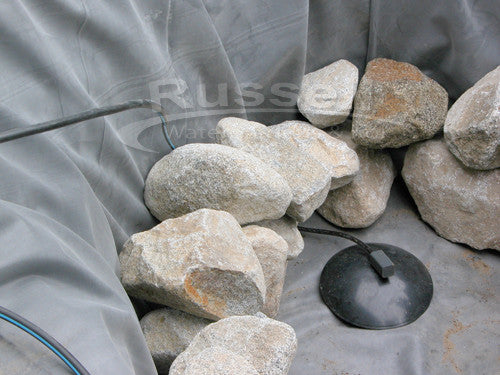
Start "rocking the pond" from the bottom up. Place the first course of rocks several inches away from the vertical wall to create a more stable base.
!!! Make sure that you don't place a sharp side or point of the rock towards any part of the liner !!!
Attach the air stone diffuser to the air line tubing. Place the airstone diffuser on top of the bottom drain. Snake the air tubing behind the rocks, up and out of the pond, and towards the UV clarifiers. Continue building the rock walls within the pond.
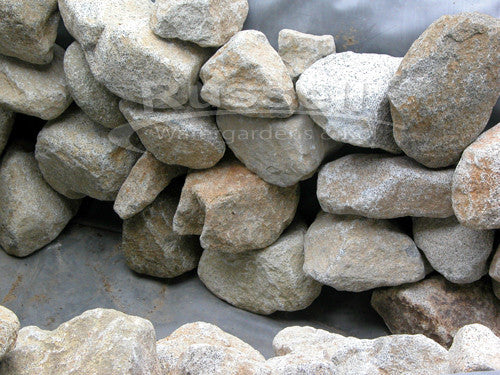
Stack your rocks with lots of gaps in between them. This reduces the amount of rock, but also provides hiding places and fun places for your fish to swim in and out of.
These gaps in the rock are also known as: "Fish Condos"
!!! Make sure you rock walls are stable !!!
If they are not, they can fall over!
You can use waterfall foam to "glue" the rocks together and to the liner
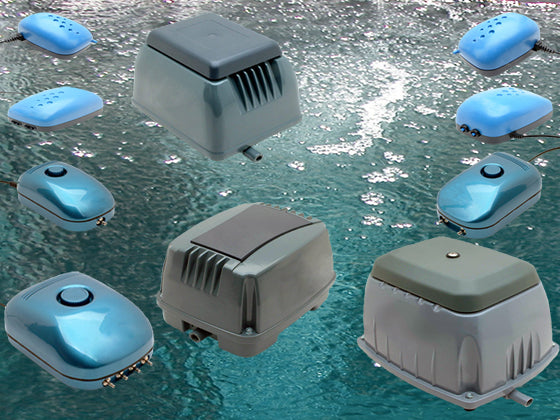
We like to install the air pump in the valve box with the UV clarifiers. This way, the air pump and UV's are underground and out of sight - but easily accessible. Grade the area around the valve box as to divert rainwater from running into the valve box. Grade the area to direct rainwater away from the valve box. The UV's and air pump are weather resistant, but not submersible.
Place the air pump on a brick or two inside the valve box to keep it off the dirt. Also, if water gets into the valve box, the air pump will be above the ground.

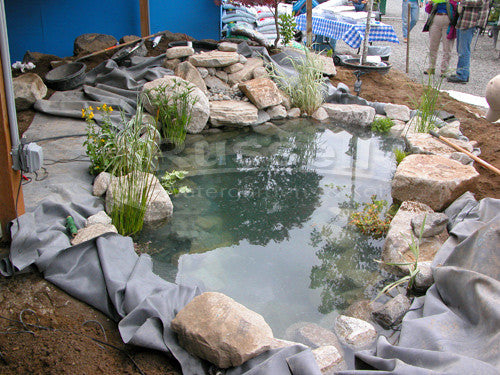
With the inner rocks wall completed, we turn on the hose to start filling the pond. It takes quite a while to fill the pond, so we start filling it before we're done building the pond.
If you look closely at this photo, you can see we have turned on the air pump to make sure it and the air stone diffuser are working properly before the water gets too deep. (Air bubbles in the water next to the rock wall under the waterfalls.)
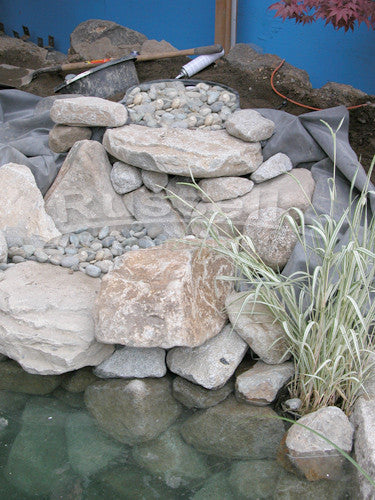
We begin building the waterfalls at this time. We have also placed some nice and large specimen boulders as focal points on the plant shelf of the pond.
We start placing our aquatic plants now. ALWAYS remove aquatic plants from the pots they come in! Here's how you plant aquatic plants in a Hybrid Pond:
- Remove the plant from its pot by pulling the pot off the plant, not the plant out of the pot! Place your fingers over the crown of the plant, turn the pot over so the plant is point downward. Give the pot a strong jolt downward with your fingers stopping the plant from falling out. Then pull the pot off the plant
- Break off most of the soil and/or mud from the root ball
- Pour an inch or so of pre-rinsed pea gravel into the bottom of an aquatic plant basket
- Place the plant into the basket and onto the pea gravel
- Place an aquatic plant fertilizer tablet or two around the root ball
- Pour pre-rinsed pea gravel onto the root ball and around the plant to just below the upper rim of the aquatic plant basket
- Place plant basket with plant onto the plant shelf of the pond
- That's it!
Notice how we do not cut off any liner until the pond is full? That is the only way to guarantee that you won't cut it too short!
Place boulders on either side of the skimmer inlet pipe and another over the top to hide it from view. This is why we had you leave the pipe sticking out and into the pond a few inches in an earlier step.
We can not stress this strong enough:
!!! NEVER CUT OFF EXCESS LINER UNTIL THE POND IS FULL !!!
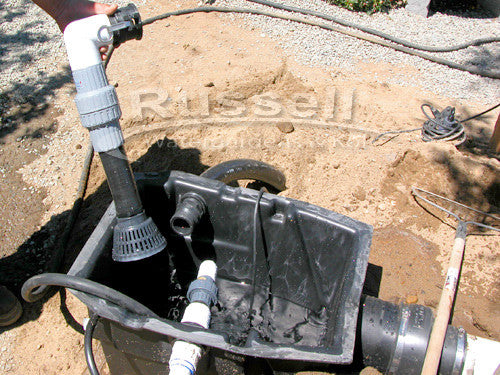
Time to finish the Hydro Vortex™ filter. Place the round media grate inside the filter. It fits over the inlet, vortex, and settling cone area at the bottom of the filter.
Pour the Hydro FilterSilk™ biomedia into the filter on top of the round media grate you just installed.
Install the upper media grate over Hydro Filtersilk™. It fits on ledge at the top of the media chamber inside the filter.
Notice how we haven't cut off the excess liner around the waterfalls yet? We don't cut off excess liner until the pump is running and we can clearly see that there are no leaks anywhere.
Install the HydroFlush™ backwash jet into the bulkhead. Please note that this pond was built in 2007. Our backwash jet now comes in from the rear of the filter, not the side as seen here. Also, the PVC fittings are now all black.
!!! DO NOT GLUE THE BACKWASH JET PARTS !!!
Compression Fit Only!
Place stones directly on the upper filter grade to completely hide the filter and all but the opening of the backwash jet.
The Hydro Vortex™ waterfall filter becomes completely invisible. Unlike low price filters that have a great that hold stones on top of the filter, the stones on top of the Hydro Vortex™ filter do not have to be removed when cleaning the filter. The Hydro Vortex™ filter cleans itself with the HydroFlush™ system you installed. Simply open the filter drain valve and turn the HydroFlush™ valve to the backwash mode. It couldn't get any easier!
Oh, another reminder: We still haven't cut off the excess liner yet!
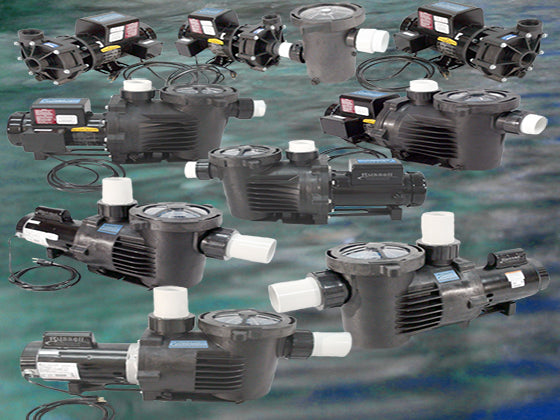
Install the small submersible pump that will power the UV system and circulation points inside the HydroClean™ pond skimmer. Install the main line check valve inside the skimmer too.
Install the external pump between the flow control valve and the HydroFlush™ valve. If it is a self priming pump - turn it on. If it is not a self priming pump - prime it with water then turn it on. Turn on the UV pump. Let there be waterfalls!
Before we cut off the excess liner we check 100% of the pond and waterfall perimeter to make sure no water is leaking out. If liner is running over and out the liner anywhere - we fix the problem before cutting the liner. If water is going over the liner, lift the liner and pack soil under the liner so it will then be above the water line. If water is leaking from a fold in the liner (the most common type of leak with newly constructed ponds), lift the liner and pack soil under the liner to raise the fold above the water line.
Check both side of the waterfalls to make sure water is running over the liner anywhere. If it is, you know what to do by now: Lift the liner and pack soil behind the liner so the liner is higher than the water line.
Now that we have examined every inch of the perimeter and fixed any leaks we found we can finally cut off the excess liner! Cut the liner no short than 6" above the water line. Roll the 6" liner under itself to a liner roll about 3" across. Places river rock and stones over the 3" liner roll.
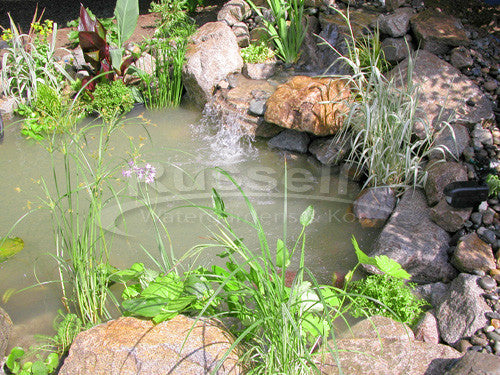
Now you can add terrestrial landscape plants around your pond for the finishing touches.

Now that you have the pond up and running, liner cut, edges detailed, and landscaping done - rinse off the entire pond - rocks, stones, and all. The pond at this point will be dirty.
No worries! We have your solution:
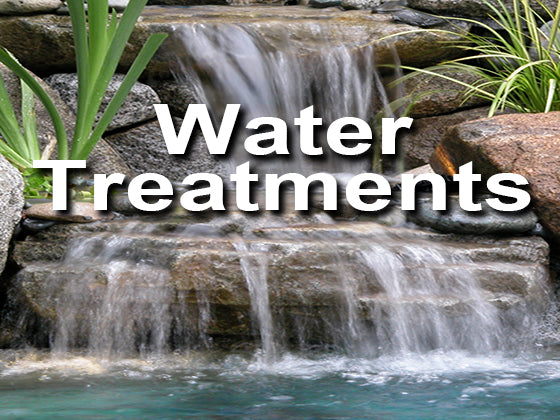
HydroFloc™ Pond Clarifier Flocculant - Water Clarifier.
Apply a proper dosage of HydroFloc™ to the pond and in 24 hours your pond will be sparkling clean! The dirt in the water will flocculate and get trapped in the Hydro Vortex™ filter. Then simply do your first HydroFlush™ to purge the filter of the dirt!
Talk about EASY!!!