


Koi Pond Kits What is a Koi Pond?
(Roll your mouse over the photo right)
For koi pond ideas, there are many ways to build koi ponds. A koi pond can be constructed with a wide variety of materials - they can be an above ground koi pond, completely in the ground, or a combination of both. No two koi ponds look alike - but they all share common fundamentals. Koi ponds are not the same as water garden ponds, and water garden ponds are not the same as a koi pond despite all the water garden pond kits marketed as koi pond kits online. So, what are the fundamentals of a koi pond you ask? Here is what you need for a koi pond:
- A backwashable biological filter
- A pond skimmer
- A bottom drain
- A bottom drain pre-filter
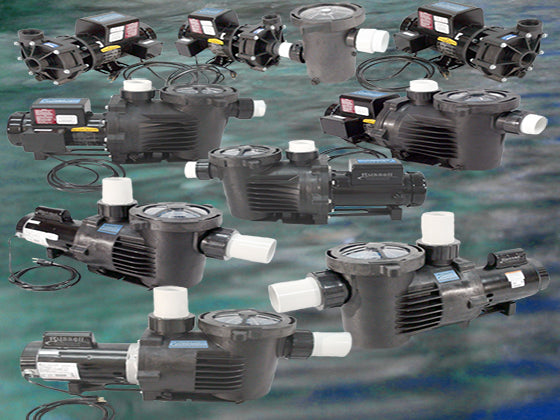
- An external pump
- Water circulation and turnover rate
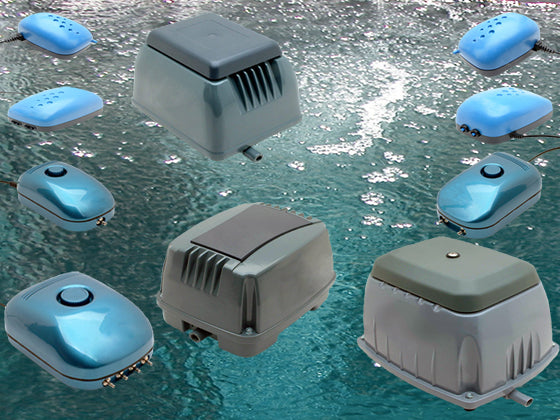
- An aeration system
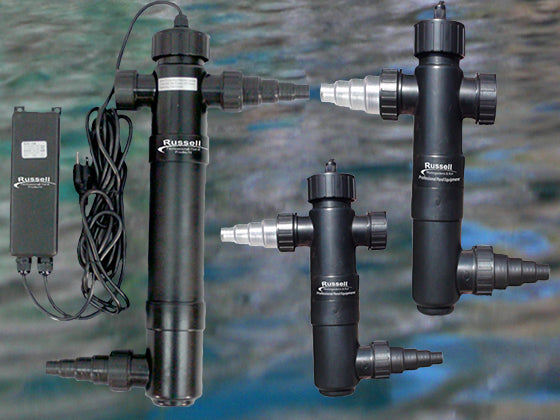
- A UV clarifying system
- Minimum depth of at least 4'
- No rocks or gravel in a koi pond
- No sharp objects that could harm koi
- No planted aquatics
What is a Koi Pond?
Think of a Koi Pond as a Swimming Pool for Koi
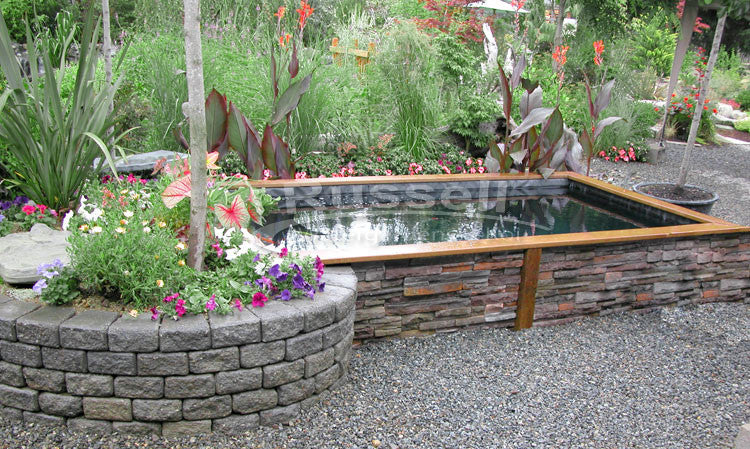
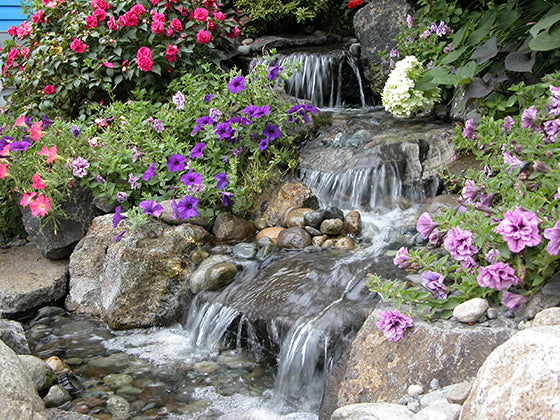
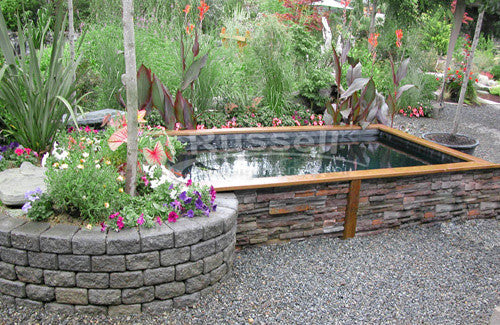
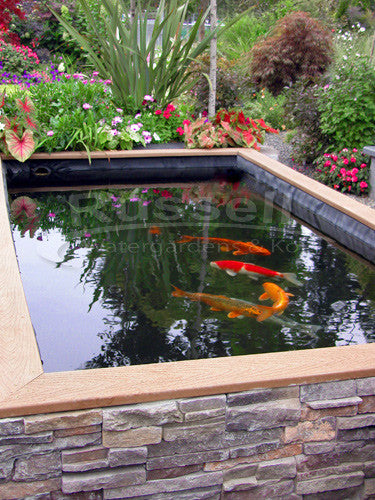
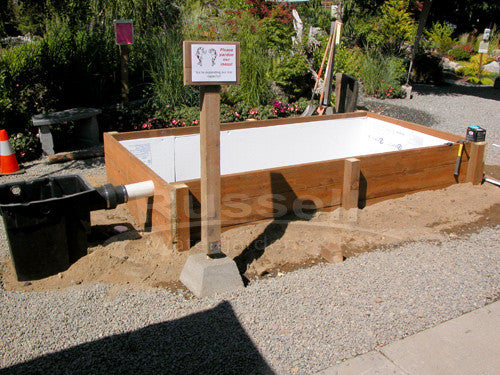
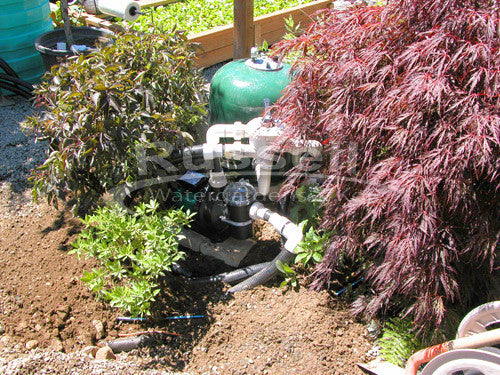
This is an example of a koi fish pond we built that is partially underground and partially above ground. When a koi pond is partially above ground it reduces your excavation depth, but also provides for a place for sitting. Sitting on the edge of your koi pond lets you more easily get up close and personal with your koi fish than a koi pond completely in the ground.
This Koi Pond Design:
This koi pond's dimensions are 6′ wide by 12′ long and 4′ 6″ deep with 1½’ above ground and 3′ below ground.
In addition to the above/below ground combination koi pond benefits we mentioned previously, we couldn't make it any deeper because of a sewer line running directly underneath the pond.
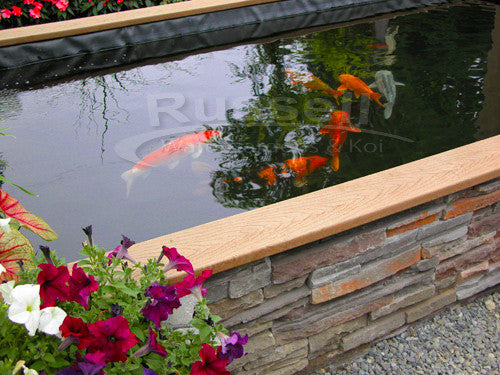
The materials and how to make a backyard koi pond
This koi pond’s walls are constructed with treated 2″x6″ boards screwed to treated 4″x4″ posts. The outer facing of the pond was then detailed with decorative Cultured Stone, the flower bed around the pond skimmer and bottom drain pre-filter is created with retaining wall blocks. A total of 6 4″x4″x8′ posts and 30 2″x6″x12′ boards are used in this construction.
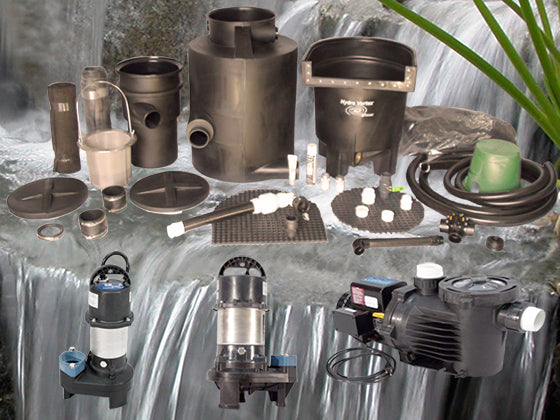
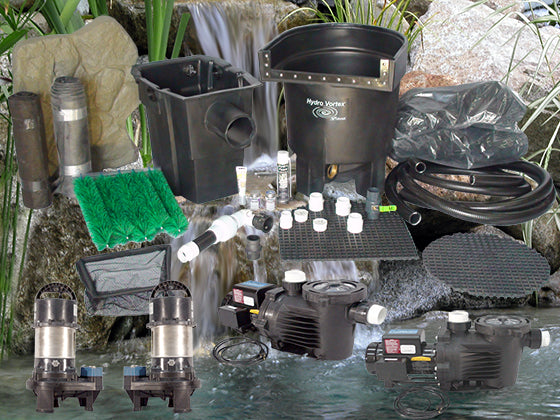
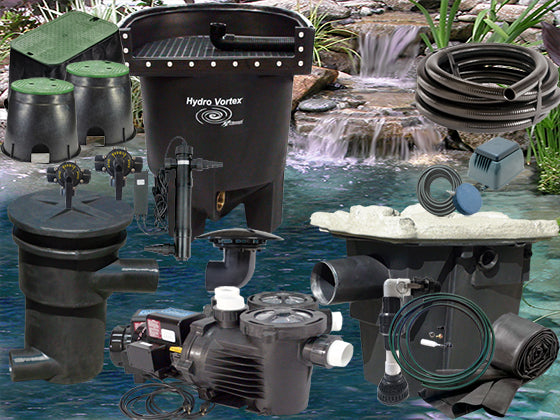
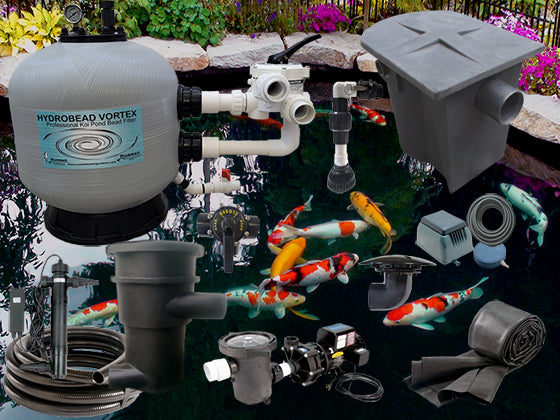
This koi pond was built using an HBV-21 Koi Pond Kit. The koi pond equipment list:
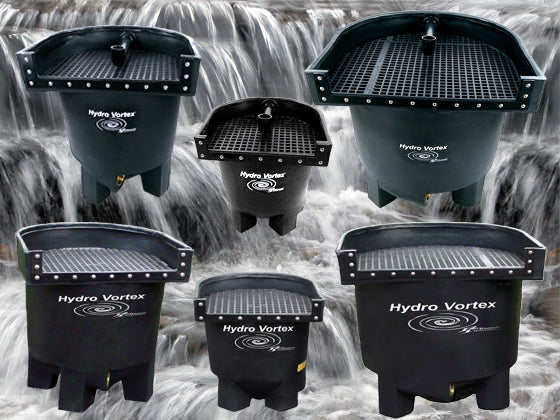
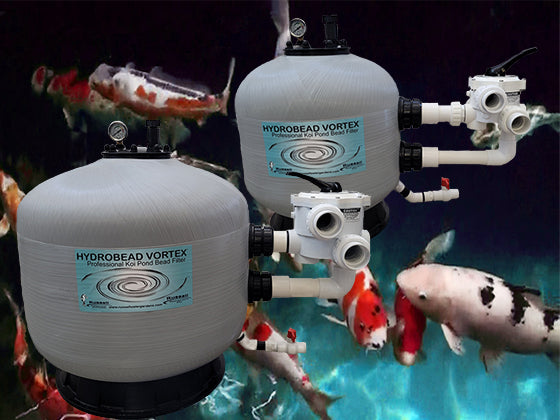
- HBV-21 HydroBead Vortex™ bead filter
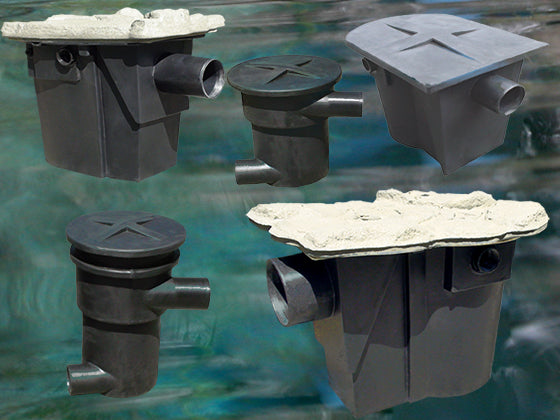
- Piper HydroClean™ pond skimmer
- 4" Bottom drain
- HydroSieve™-PF bottom drain pre-filter
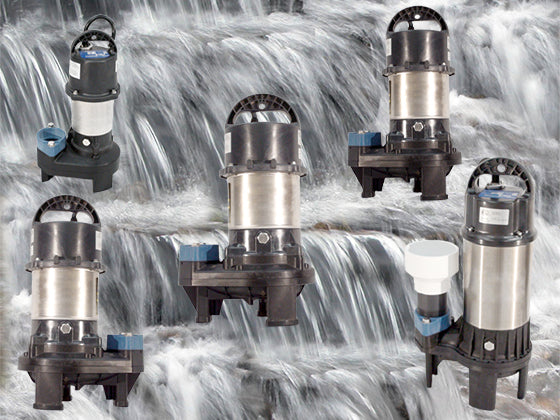
- C-3540-2B self priming external pond pump 3,540 GPH 2" IN/OUT
- 2" check valve assembly with intake screen
- 2x36 watt Hydro-UV™ modular UV clarifying system
- Mag-drive pump for UV system 1,200 gph 1" IN/OUT
- Rectangular valve box for UV and aeration systems
- 1" union assembly
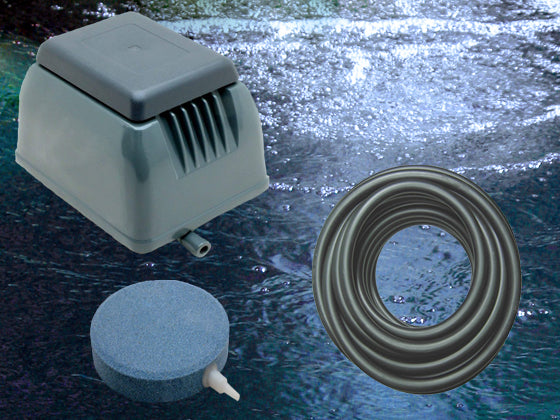
- PA-3000 pond aeration kit
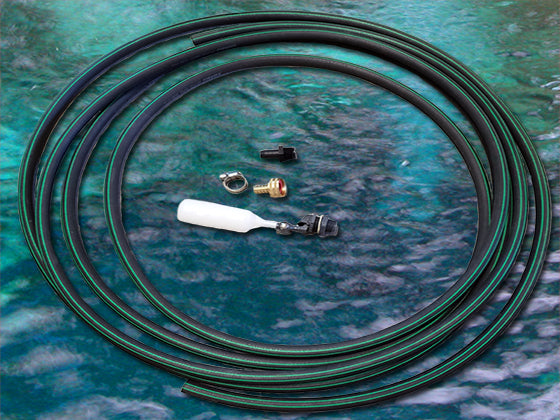
- Auto fill valve kit
- 4" flexible PVC pipe between bottom drain and pre-filter
- 4" rigid PVC pipe between the pond and the pond skimmer
- 2" flexible PVC pipe between the skimmer, pre-filter, filter, pump, and pond
- 1" flexible PVC pipe between mag drive pump, UV system, and pond
- 2" 3-way valve for flow control between skimmer and bottom drain pre-filter
- Round valve box for 3-way valve
- Underground rated treated 2x6 boards
- Underground rated treated 4x4 posts
- Stainless steel deck screws (for corrosion resistance)
- 80# bag of ready-mix concrete
- ½" Styrofoam insulation sheets
- Geo-textile underlayment
- 45 ml EPDM fish-safe rubber pond liner
- Concrete retaining wall blocks
- Stainless steel lath
- Cultured stone veneer
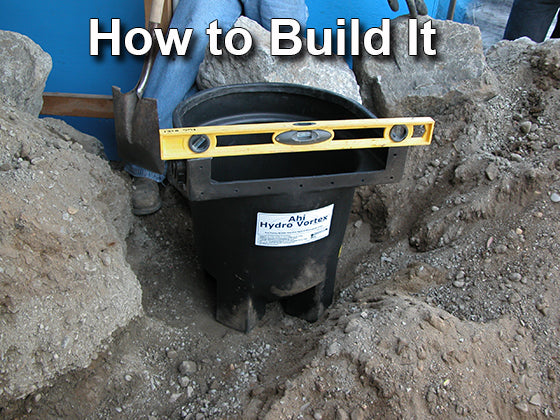
Building a Koi Pond is easy – simply follow these procedures outlined in the following series of photos.
Start out by creating a rough drawing of the pond and where you want the filtration system to be located.
In this case, we're building a 12′ long by 6′ wide rectangular koi pond . The pond skimmer and bottom drain prefilter are installed 18″ back from the pond’s edge. The 3-way flow control valve is located inside a round valve box between the skimmer and pre-filter. The UV system and aeration system are located inside a rectangular valve box adjacent to the skimmer and pre-filter. Both the bead filter and external pond pump are located about 18′ away from the pond.
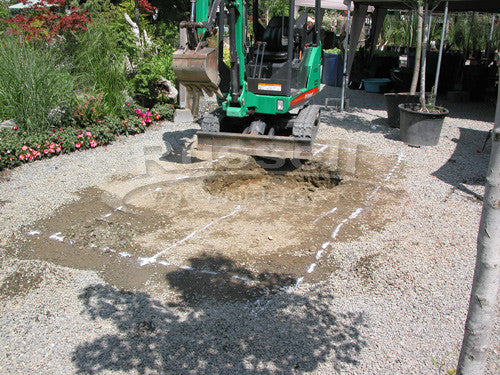
Start by painting your koi pond design drawing on the ground in “actual size”. Use your actual dimensions so you can clearly see what you're going to build prior digging
!!! Make sure to always call your local Utilities
to locate underground pipes, gas lines, and electric lines before you dig !!!
Digging with a small excavator from your local rental place makes for a much easier time. They're fun and easy to operate too!
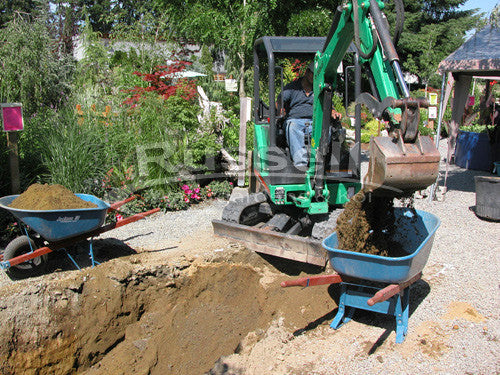
A small excavator easily digs the hole for the pond, and loads wheelbarrows for easy soil re-locating.
In this case, much of the excavated soil will be re-used to hide the pond skimmer, pre-filter, control valve, aeration, and UV system from view Excavated soil is also used to create a raised flower bed at one end of the pond.
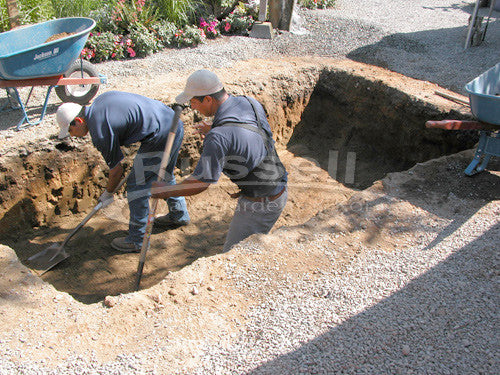
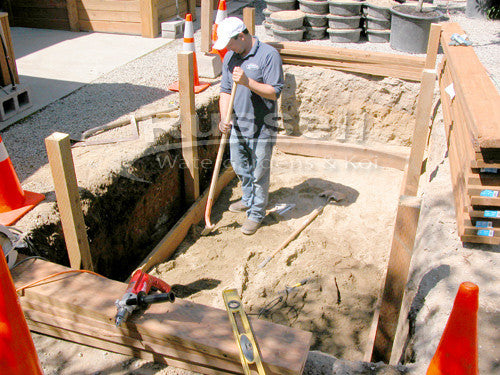
Use the excavator to do the “heavy” digging. Then, fine tune the excavation by hand with shovels. The excavation should be at least 1 foot longer in every direction to allow construction of the retaining walls.
In this case, the finished pond will be 6′ x 12′ so the excavation is 8′ x 14′.
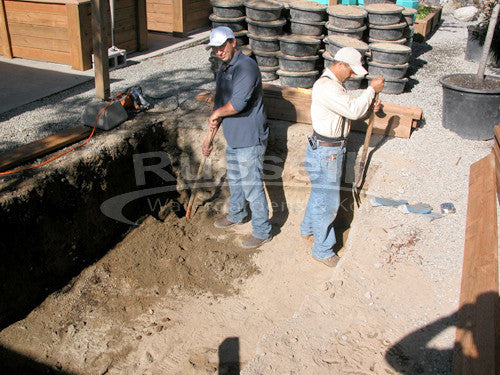
A Koi Pond retains the earth “behind” the liner, whereas water garden ponds are different by retaining earth in the pond with rocks and boulders. Many different types of materials can be used to retain earth in a koi pond – from treated wood, to concrete, to concrete blocks. In this case, we are using pressure treated “ground contact” lumber for its ease of construction and relatively low installation cost. The design is simple, 4″ x 4″ x 8′ posts on all four corners and one additional post in the middle of each 12′ side for a total of six posts.
Dig each post hole 18″ down by 12″ wide from the bottom of the pond excavation. Set the 4″ x 4″ posts in the holes and fill with concrete – just like setting fence posts.
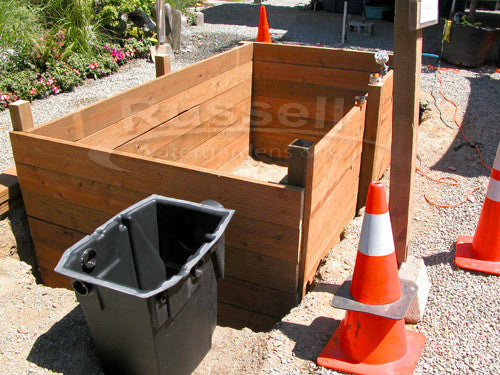
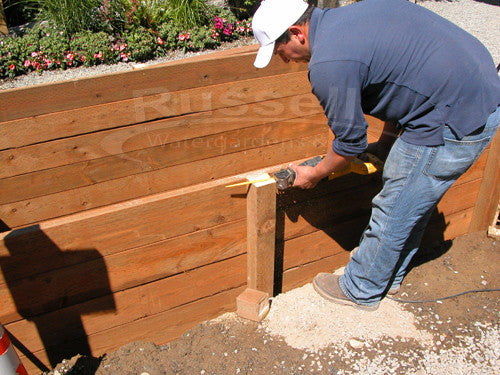
Using Stainless Steel deck screws, attach the pressure treated 2″x6″ retaining wall boards to the posts to hold them level while the concrete in the post holes dries.
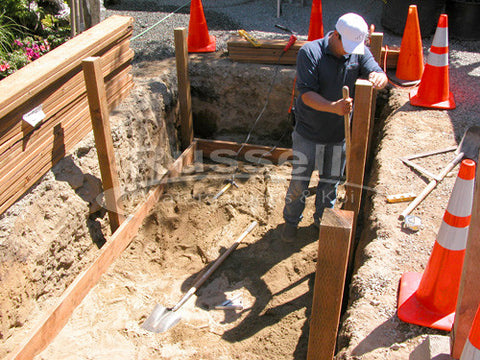
Construction of this koi pond was during business hours at our former location in Redmond, WA – thus the use of traffic cones to warn customers of the construction area. We didn't want anyone falling in the hole we just dug!
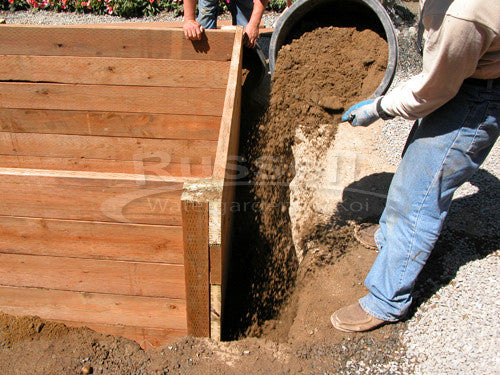
This photo shows why the excavation is one foot larger in all directions than the finished pond. It gives you room to work down in the excavation. Once all the retaining wall work is completed, you can backfill the extra excavation space with soil previously removed.
The 2″x6″ boards hold the posts level while the concrete in the post holes dry.
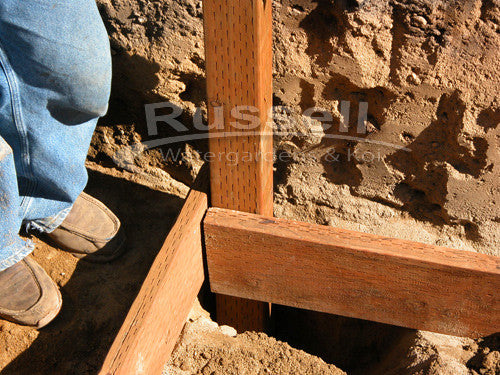
Place a layer of soil over the concrete in the post holes to prevent any sharp or abrasive edges from causing harm to the pond liner.
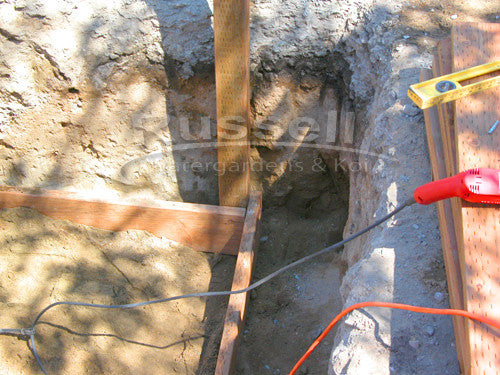
It's a good idea to let the concrete holding the posts cure overnight to ensure they won’t move out of level when you start attaching the retaining wall boards.
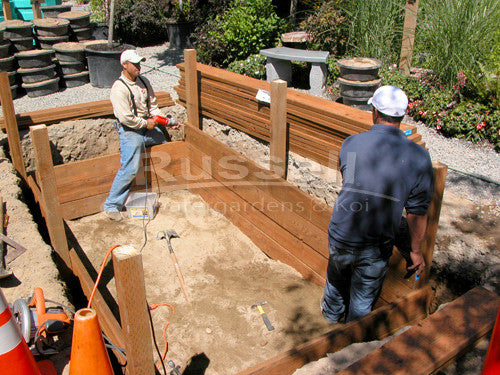
Once the concrete holding the 4″x4″ posts has cured, you can begin attaching the 2″x6″ boards to the posts. Its a good idea to use Stainless Steel screws – they cost more – but they won’t corrode and fail over time. Especially since most of them will be underground!
Attach the 2″x6″x12′ boards to each side, and cut a 2″x6″x12′ in half to make 2″x6″x6′ boards for each end. Each side and end will be 10 boards high.
Again, you can use many things to retain the earth, this example shows how using pressure treated lumber is quick, simple, and cost effective.
In this case, the koi pond design calls for 3′ below ground, and 1½’ above ground – so you can see, the use of pressure treated lumber makes this easy. You’re simply making a large box. A swimming pool box for your koi!
The limitation of using treated lumber is that curved walls are not possible. For curved wall designs you can use concrete blocks (as we do in our Bubble-less koi pond), polyurea, concrete – or gunite can be used.
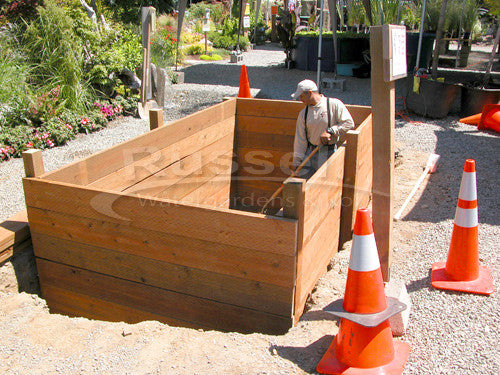
With the koi pond box/retaining walls completed, you’re now ready to place the Piper HydroClean™ pond skimmer. In a square or rectangular koi pond design – place the HydroClean™ pond skimmer inlet pipe near a corner for maximum surface circulation and current draw.
!!! DO NOT BACKFILL EXCAVATION SPACE AROUND BOX YET !!!
!!! YOU WILL BE PLACING YOUR PIPES IN THESE AREAS !!!

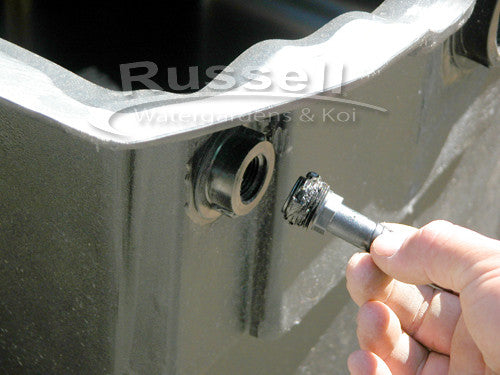
Mark the spot where the HydroClean™ pond skimmer inlet pipe will draw water from the pond’s surface. Then, using a hole saw, drill a hole through the wood.
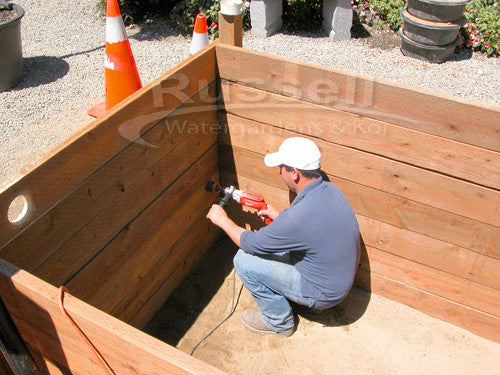
You can see the HydroClean™ pond skimmer hole cut through the wood. Next, you’ll want to use a smaller hole saw to drill a hole for your water return lines.
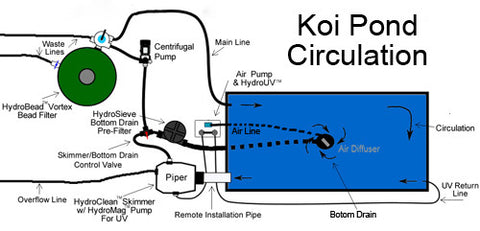
Water exits this koi pond in two places – the bottom drain at the center of the bottom of the pond, and the pond skimmer in the upper corner of the pond.
Water returns to this koi pond in two places - at opposite ends, opposite corners, and in opposite directions. Each return is parallel with the side closest to the return. This causes the water to circulate in a circular motion. A circular water motion aids in the efficiencies of both the bottom drain and the pond skimmer.

To create a circular water movement flow – install the main water return in the opposite corner of the same end of the pond as the pond skimmer near the middle depth of the pond.
Install the UV return line in on the opposite end of the same side as the pond skimmer. This will cause the water current to create a circular “vortex” that will cause fish waste to drop to the center of the pond where the bottom drain can remove it from the koi pond and pass it to the HydroSieve™ pre-filter.

Next, using the hole saw again, drill a hole in the wood for your UV water return. It should be in the opposite end and opposite corner from the main water return. This inlet should be near the bottom to increase the current at the bottom of the pond and to “push” debris out of the corners where it will then get drawn into the vortex current and into the bottom drain for removal by the HydroSieve™-PF pre-filter.
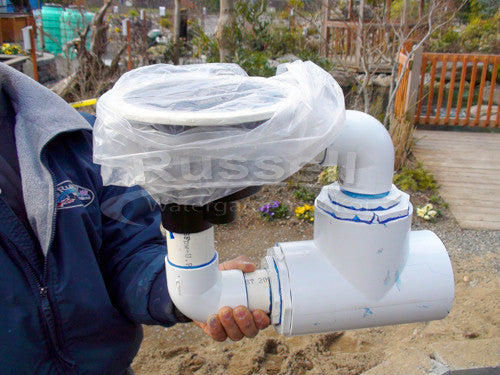
Here's a useful tip: Place a plastic bag over the opening of your bottom drain. This way, when you backfill around the drain with soil - soil won't get down inside the drain!
We'll show you when to remove the plastic later.
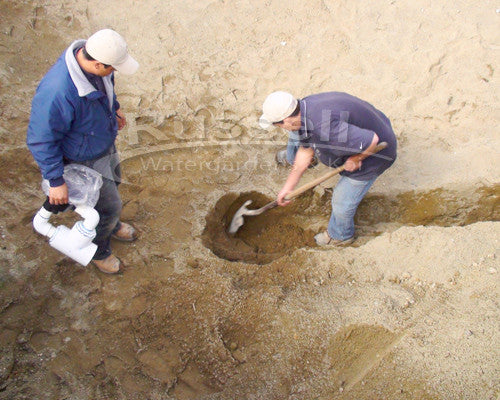
Locate the center of the bottom of the koi pond. Measure end to end and side to side to find the center.
a hole large enough for the bottom drain at the center of the pond. Then trench wide enough and deep enough for the 3" or 4" drain pipe.
Dig under the retaining wall boards so you can bring the pipe up to the HydroSieve-PF pre-filter. Flexible PVC pipe makes this much easier than cutting and glue a bunch of rigid PVC pipe and fittings.
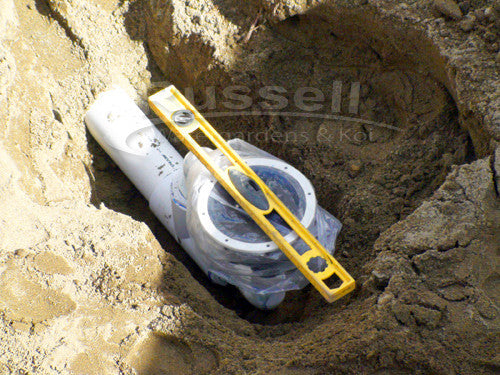
Level the bottom drain in all directions to ensure proper function.
At this time, lay the aeration tubing along side the 4" bottom drain pipe. Leave a aeration tube stub above ground at least 18" long.
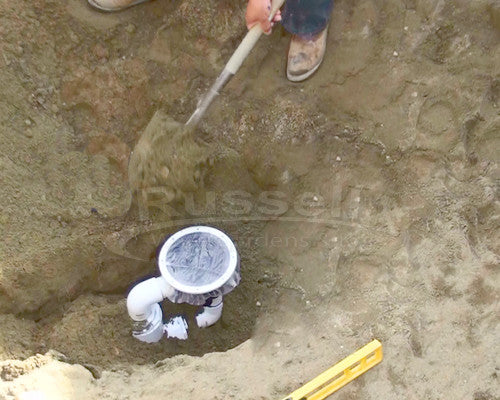
Back fill around the bottom drain and on top of the drain pipe.
Make sure to compact the soil around the bottom drain as well as around and on top of the drain pipe. There is going to be thousands of pounds of water pushing down on the soil - so make sure you have it completely compacted. If you don't you'll have settling areas later on the will be a costly repair.
Do you see why we recommend a plastic bag over the bottom drain at this stage of building a koi pond?
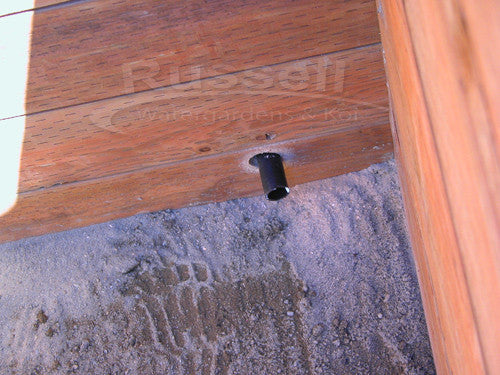
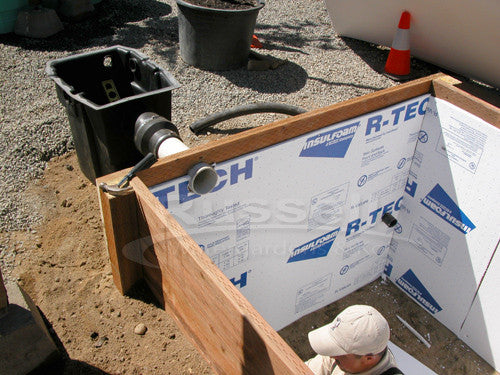
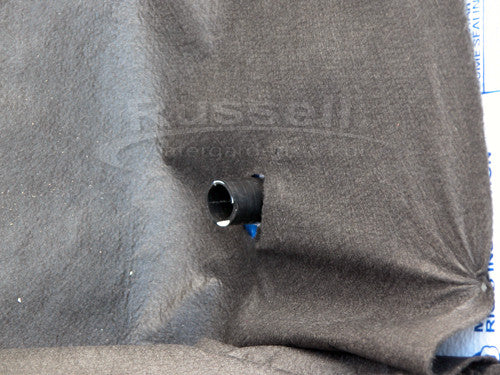
Next, slip your HydroClean™ pond skimmer remote installation pipe through the hole cut in the pond box/retaining wall. Extend it into the pond area approximately 4".
You will be installing styrofoam, underlayment, and pond liner inside the pond and the remote installation pipe needs to extend far enough into the pond to accommodate the 1" liner gasket collar.
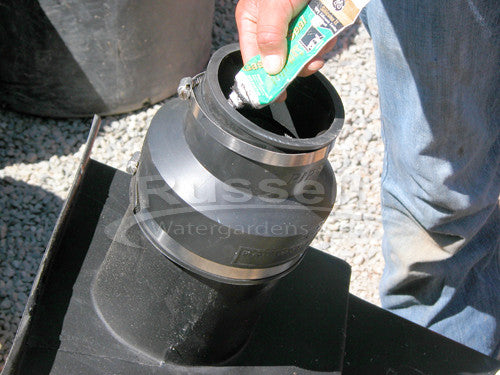
For this installation, we’re using 4″ PVC pipe to set the Piper HydroClean™ pond skimmer 18″ away from the pond’s edge. The skimmer inlet pipe is 6" so we're going to use a 6-4" reducer coupler. We're using the Piper skimmer because it has room for multiple pumps, an auto fill valve, and an overflow port.
Apply a solid bead of the Silicone that’s included with the skimmer to the inside edge of both ends of the reducer coupler.
Slip the siliconed remote installation reducer coupler onto the Piper HydroClean™ pond skimmer inlet pipe. Next, slide the the remote installation pipe into the reducer coupler. Next, tighten the single stainless steel nut at each end to lock it all in place.
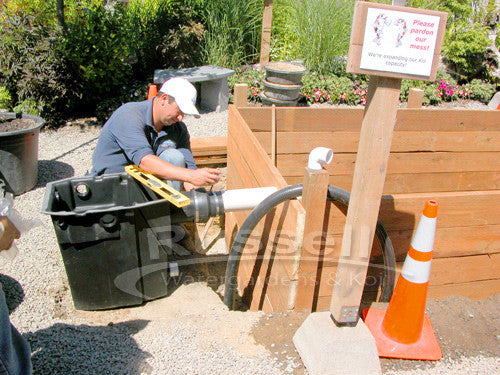
Now is the time to level the pond skimmer. Make sure it is level side to side and front to back to ensure proper function of all it's inlet and outlet ports.
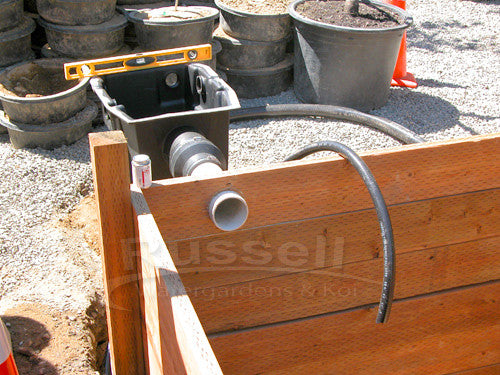
Extend the UV return pipe through the hole cut in the pond box/retaining wall. Lay the pipe inside the open work area between the excavation edge and the pond box.
Extend the flexible PVC pipe around the pond box/retaining wall to where the Hydro-UV™ Clarifier will be installed.
Liner will get attached to this pipe the same way liner attaches to HydroClean™ pond skimmers – with a rubber collar and Stainless Steel clamp.
With the plumbing lines through, around, and under the pond box/retaining walls – cut the 4″x4″ posts level with the uppermost 2″x6″ retaining wall board.
Now that all the pipes are laid in the open areas outside the pond box you can backfill the “work area” outside the pond box/retaining walls. Compact the soil as you backfill to help reduce future settling.
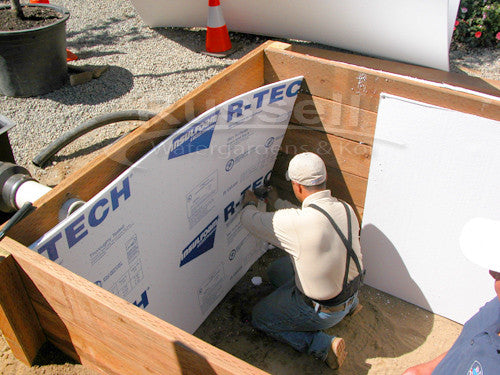
Installing ½” Styrofoam insulation to the inside of the pond box/retaining walls protects the liner from wood splinters, helps insulate the pond for a more stable temperature, and reduces vibrations that can startle the Koi. Since this pond is partially above ground, the styrofoam helps stabilize the water temperature, but also reduces the shock effect on the koi when children kick the side walls.
Use the stainless steel screws to attach the styrofoam to the pond box.
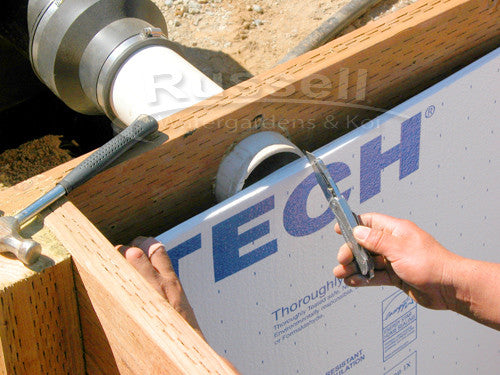
The insulation easily cuts around the pipe inlets and outlets. This is ordinary styrofoam insulation sheets you can find at any home improvement warehouse store. It comes in 2'x4' and 4'x8' sheets.
It is not necessary to insulate the bottom of the pond – just the vertical walls. A layer of underlayment will protect the liner from abrasive items in the soil. Just make sure there are no sharp rocks or roots sticking up!
The koi pond box is complete, the insulation is complete, the pond pipes are in place, the excavation gap backfilling is complete – now you’re ready for the next step.
Time to hook all up!
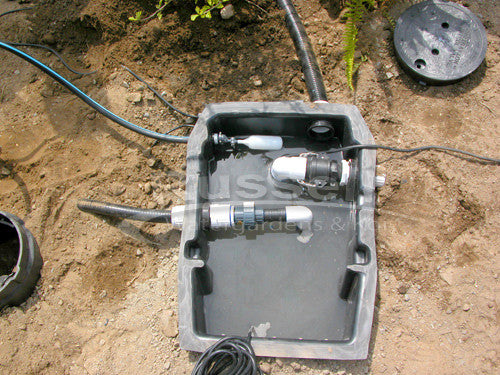
Install the UV clarifiers and aeration system so that they fit inside a rectangular valve box. Connect the UV pump outlet port of the Piper pond skimmer to the inlet of the first UV. Connect the outlet of the first UV to the inlet of the second UV. Now you can connect the UV return pipe to the outlet of the second UV.
Attach the bottom drain 4" pipe to the inlet of the HydroSieve™-PF pre-filter.
Connect the skimmer's main pump outlet to one side of the 3-way flow control valve. Connect the pre-filter's outlet to the other side of the 3-way flow control valve. Connect the outlet of the 3-way valve to the pipe the will be running to the external pump.
Extend the main pond return pipe to where the HydroBead Vortex™ filter will be located.
At this point you can either continue working on the equipment plumbing - but we recommend preparing the pond box for underlayment and liner so you can start filling the pond. It takes quite a while to fill a pond with a garden hose - so we want the pond to be filling while we hook up the remaining equipment.
This is a time saving tip!
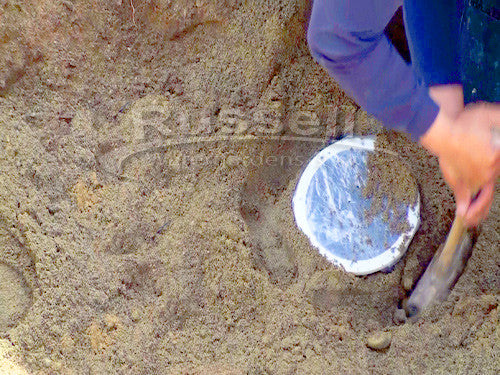
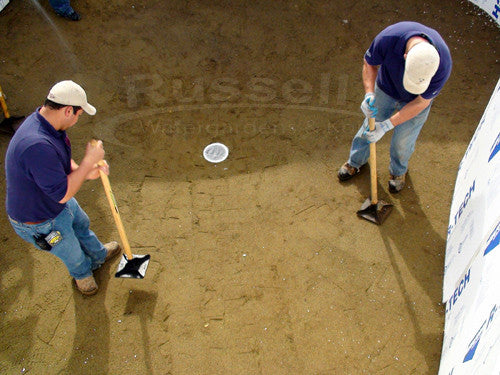
Grade the bottom of the pond so that the bottom drain is at the deepest point. Grade the soil upward and outward from the drain to all sides of the pond. If you need to add soil to do so .... go ahead and do it now. You want the entire koi pond bottom to slant towards the bottom drain for maximum efficiency.
Just as important as the grading is the soil compaction. Compact the soil 5X more than you think you need to! Remember - you're going to have thousands of pounds of water pushing down on the bottom of the koi pond. You want the soil to remain where you've placed it!
Note that the plastic is still on the bottom drain.
Now you're ready to install the underlayment. Cut the underlayment into pieces that fit the bottom, and each of the sides. This way you'll have the least amount of wrinkles under your pond liner.
Cut the underlayment around the two pond return pipes and the skimmer inlet pipe.
Cut the underlayment away from the bottom drain.
Again, the plastic is still on the bottom drain.

Next, install fish safe 45 mil EPDM rubber liner. Fold the corners inward as if gift wrapping a present in reverse. Leave at least 12″ over the side walls of the pond. You’ll lock it down later with a cap board or stone.
There are many ways to hold water in a koi pond – rubber liner, concrete, and polyurea are the most popular. We’re using rubber liner in this case because it is the most cost effective of the three.

Attaching rubber liner to the HydroClean™ pond skimmer remote installation pipe is quick and easy.
- Place a bead of Silicone around the pipe’s outer perimeter
- Fold the liner over the pipe like a paper towel over a drinking glass
- Place the rubber collar over the liner and pipe
- Cut a hole in the middle of the pipe ½ the diameter of the pipe (4" pipe cut a 2" hole, 6" pipe cut a 3" hole, 2" pipe cut a 1" hole etc.)
- Push the liner and collar back over the pipe until the end of the pipe squeezes through the hole in the liner
- You’ll see how the liner makes its own water tight gasket around the pipe
- Then tighten the stainless steel nut on the stainless steel clamp to secure it in place
- You’re done! Simple, quick, and easy!
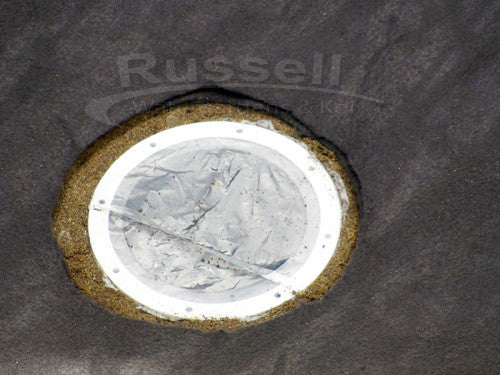
Install the Bottom Drain and Air Stone Diffuser


- Using your hands - "feel" the bottom drain basin under the pond liner
- Use a razor knife to cut an "X" in the center of the bottom drain opening - in the middle of the drain opening and only as wide as your hand !!! DO NOT CUT LINER UP TO THE INNER EDGE OF THE DRAIN BASIN !!!
- Lift the points of the "X" to remove the plastic bag that is covering the drain basin and place the gasketed mounting plate on the liner over the drain basin
- Lift as section of the "X" in the liner to visually line up the screw holes of the gasket plate and the drain basin
- Using an awl poke down through two of the mounting plate screws holes directly into the screws holes of the bottom drain itself
- Remove the mounting plate - inside the "X" - apply a generous amount of silicone on the upper perimeter of the drain basin - including the screw holes
- Place the gasket plate back on the liner in line with the holes you use a couple Phillips screwdrivers to hold it in place while you pokes holes through the remaining screw holes
- Install all eight screws - !!! HAND TIGHT ONLY !!! - !!! DO NOT USE A DRILL AS OVER TIGHTENING MAY CAUSE CRACKING !!!
- Using the inside rim of the mounting plate as your guide - cut out the liner from inside the drain basin - smooth out any protruding silicone
- Align the drain grate with the inserts and install it's two screws - the bottom drain is done!
- Attach the air stone diffuser to the air tubing
- Place air stone diffuser on top of the bottom drain grate - you're done!
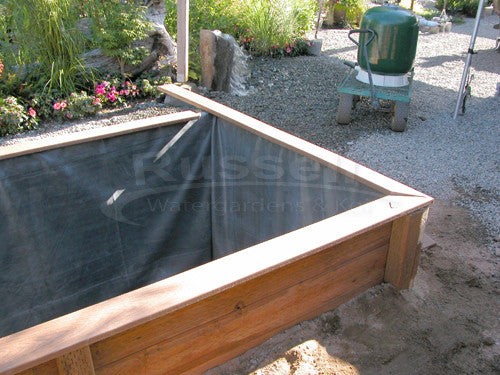
The liner installation is now complete. Smooth out the large wrinkles – but don’t worry about the small wrinkles. When filled with water, the water pressure will flatten out most of the small wrinkles for you.
Lock the liner to the pond box/retaining walls with either a cap board or cap stone. In this case, we are using plastic Trex deck boards. Do not use treated wood here – use only materials that are safe for koi and friendly to the human touch. Again, attach this cap board to the pond box/retaining walls with Stainless Steel screws.
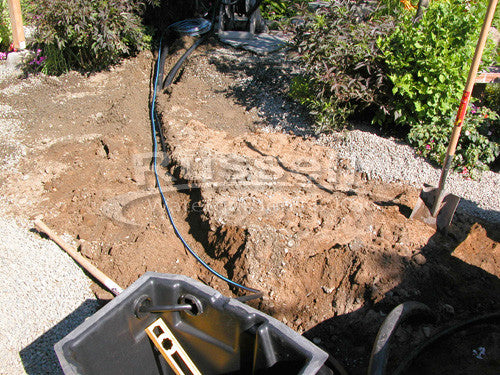
We are remotely installing the HydroBead Vortex™ HBV-21 filter and external pond pump 18′ away from the koi pond behind bushes in the gardens. We need to excavate a trench for the plumbing lines from and back to the pond.
Note the auto fill valve kit ½" water line in the trench. The water source just so happens to be near where we're installing the HydroBead Vortex™ HBV-21 filter.
Install the HydroBead Vortex™ HBV-21 filter on a level compacted firm surface as it will become very heavy when full of water. Here, we set them on brick pavers over compact soil
- Connect the pipe coming from the flow control valve to the external pump inlet
- Connect the pump outlet to the filter inlet
- Connect the filter outlet to the pond return
- Connect a pipe to the "Waste" port of the filter valve to divert backwash water to a desired location
- Connect the auto fill valve kit pipe to the water source
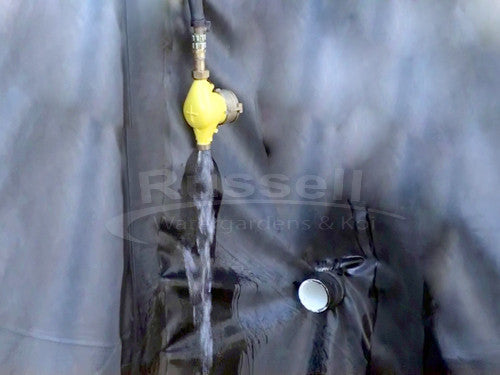
Attach the auto fill valve kit to the HydroClean™ pond skimmer. The float threads into the inside ½" port and the barb fitting threads into the outside.
Attach the auto fill valve kit water supply pipe to the barb fitting outside the pond skimmer.
Begin Filling the Pond
Rent a water volume meter to measure exactly how many gallons of water the pond and filtration system holds. Knowing the exact water volume will be a big time saver in the future when adding water treatments and/or any fish medications to your pond.
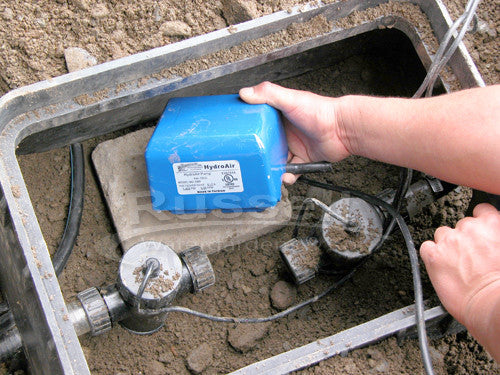
Install the pond air pump into the the same valve box the the UV clarifiers are in. Place it on a brick to keep it off the soil.
Connect the air tubing to the air pump. The air diffuser is already connect at the other end at the bottom drain.
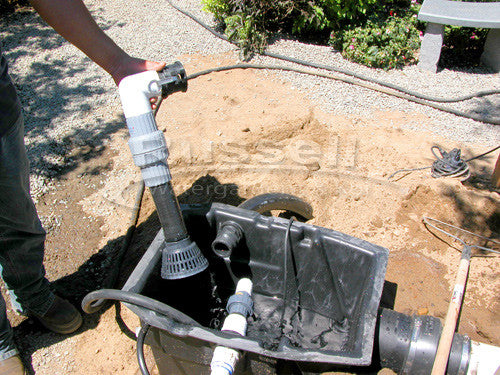
Install the external pump's check valve assembly (CVA) inside the HydroClean™ pond skimmer. Attach it to the outlet port that is connected to the flow control valve.
Finish Connecting All Components
- Mag drive pump to the UV clarifiers
- UV clarifiers to one pond return
- The bottom drain pipe to the pre-filter inlet
- The outlet of the pre-filter to the one side of the flow control valve
- The main outlet of the pond skimmer to the other side of the flow control valve
- The outlet of the flow control valve to the pump
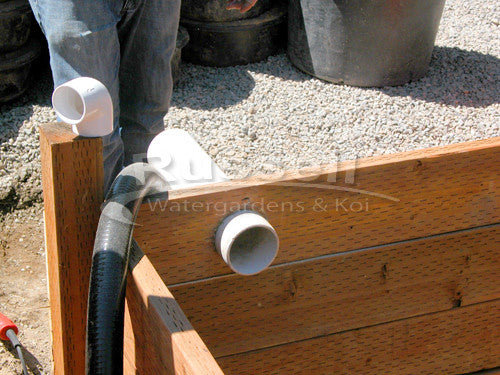
- An overflow pipe to the remaining outlet port of the pond skimmer
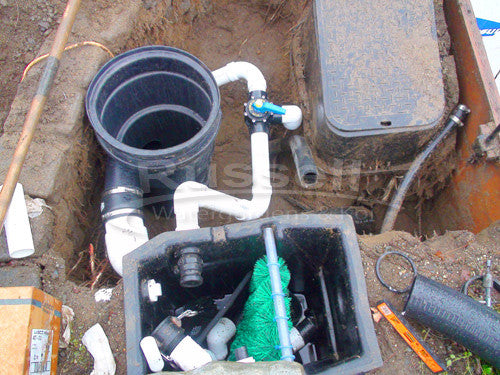
This is what the HydroClean™ pond skimmer's plumbing looks like with two pumps, an overflow pipe, and an auto fill valve kit remotely installed away from the pond's edge. HydroClean™ pond skimmers provide you with more plumbing options than any other brand of pond skimmer .... period!
You can know install the leaf net and filter brush rack inside the pond skimmer.
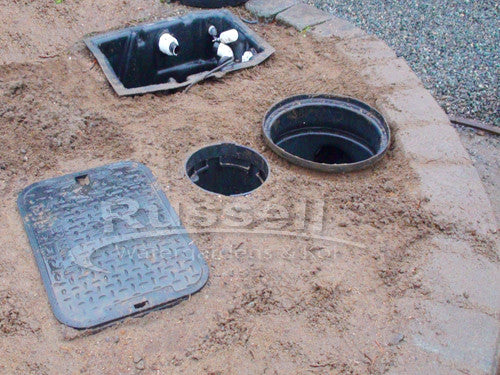
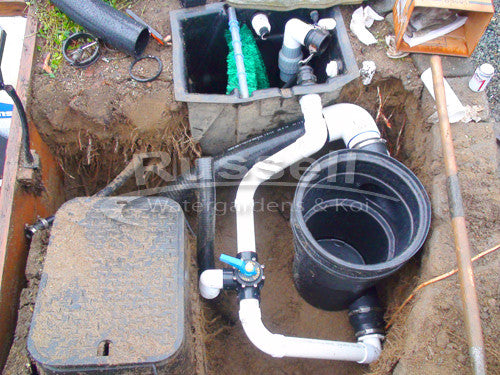
Construct a retaining wall around the pond skimmer, pre-filter, flow control valve, and the valve box containing the UV system and air pump.
Backfill the area with soil. The filtration system is completely installed!
Final Touches
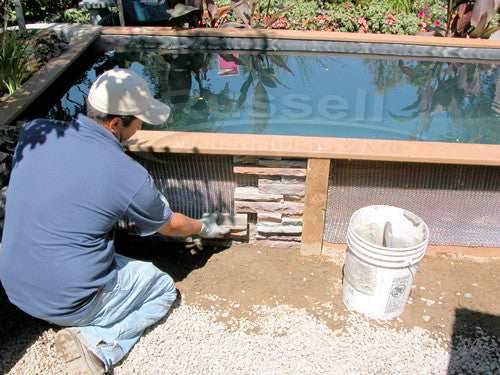
We're adding landscaping and cultured stone to the exterior of the koi pond.
- Attach metal lath to the koi pond box where you want to add the cultured stone WITH SHORT ½" SCREWS !!!
- Apply a layer of mortar the back of the cultured stone (make sure the mortar is not runny or the stones will slide around)
- Press the cultured stone onto the metal lath with some pressure so that the mortar squishes into the lath - hold it there for 30 seconds or so until stable
- Cut pieces where necessary with a rented brick saw
- Apply a seal coat to the cultured stone when finished
- Plant perennial flowers, shrubs, and a tree - add annual flowers for seasonal color
- Add koi to the pond!
Your Brand New Beautiful Koi Pond is Complete!