


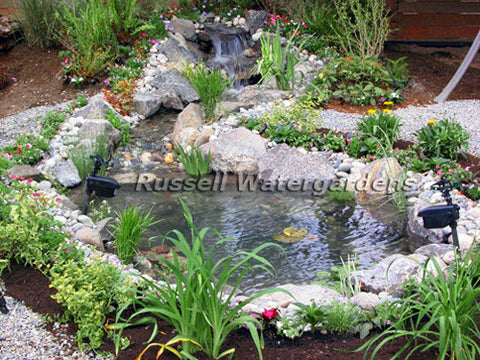
The first step is to sketch a rough design on a piece of paper. Then paint the design on the ground to actual dimensions. Then, paint where you envision the Hydro Vortex™ Easy to Clean Waterfall Filter and the HydroClean™ Pond Skimmer will be installed. The two units should always be opposite each other – water exiting the pond should always be at the furthest point away from where water enters the pond for maximum circulation. Roll your mouse over the photo on the right to see how this pond started from a drawing.
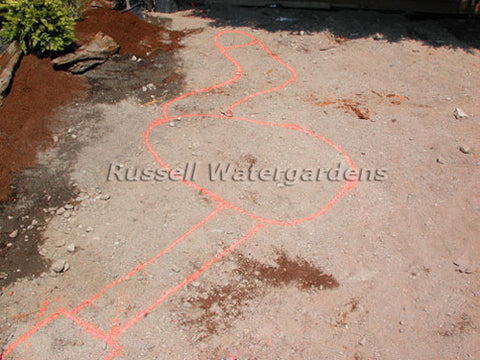
Measure the widest points of the pond. Measure the length of your stream. Measure the distance between the pond and where you will remotely install your HydroClean™ Pond Skimmer. Measure the distance between the skimmer location and the filter location. Then either order your Custom Water Garden Pond Kit here online or call our Friendly Customer Service Associates and give them your dimensions. Either way, we’ll create a custom water garden pond kit specifically tailored to fit your design! With a Custom Water Garden Pond Kit from Russell Watergardens & Koi, you won't have to make your water garden pond design fit inside the limitations of a pre-packaged pond kit!

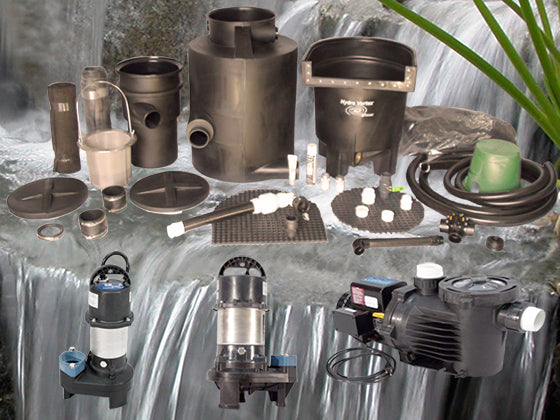
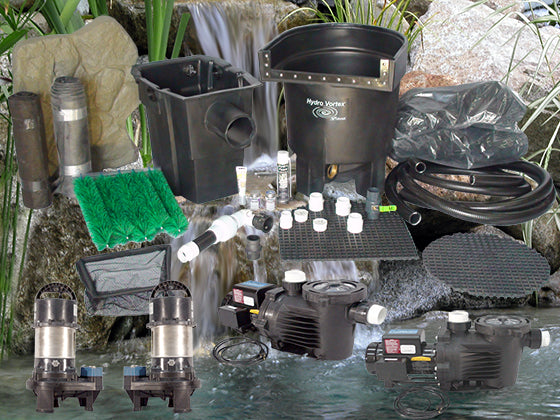
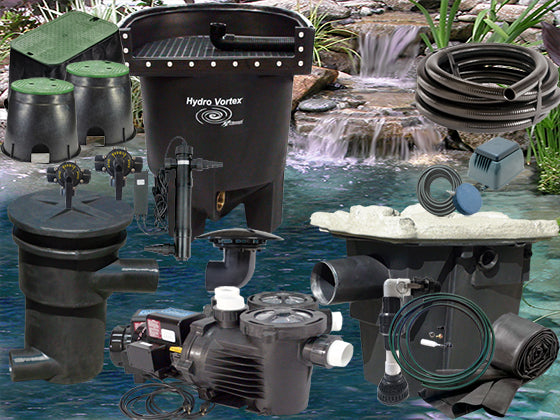
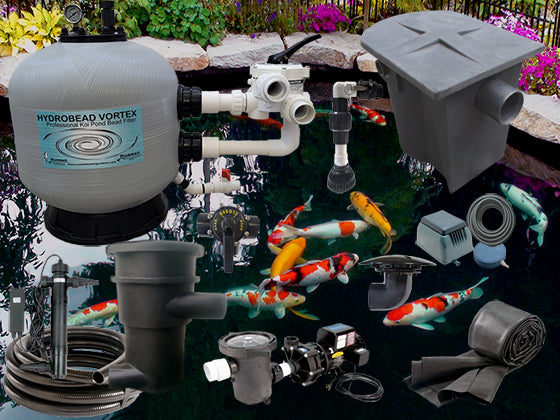
With your Water Garden Pond Kit on site, set out the components to gain complete perspective of what you are envisioning.

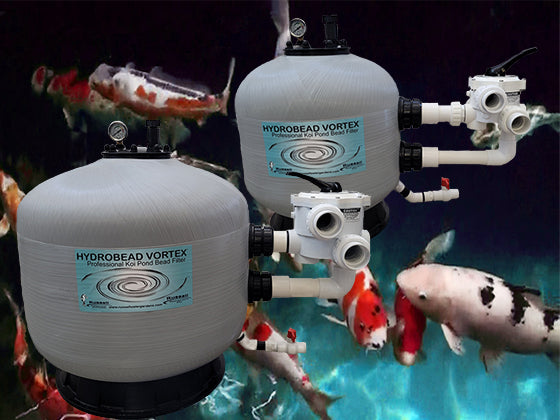
Place the Hydro Vortex™ Filter at the head of your waterfalls and stream.
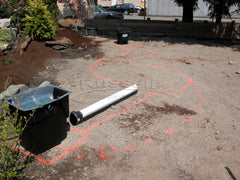
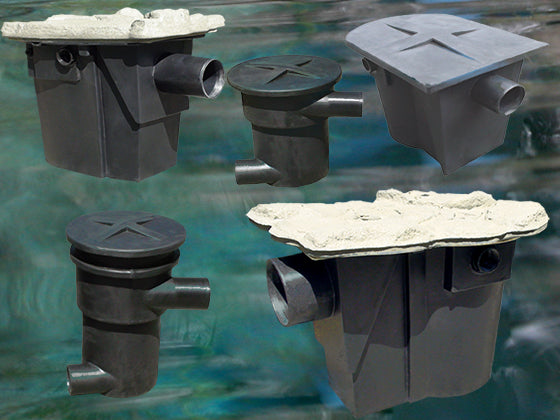
Place the HydroClean™ Pond Skimmer and its Remote Installation Pipe at the opposite end of your design.
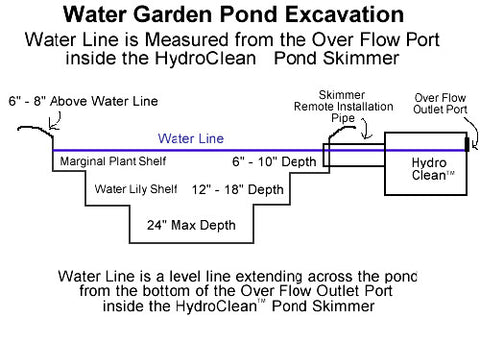
A water garden pond is virtually always designed with three shelves at varying depths. The pond is excavated in “stair-steps” to a maximum depth of 24″. The first step is the “Marginal Plant” shelf at 6″ – 10″ deep. The second shelf is the “Water Lily” shelf with varying depths of 12″ – 18″. The Maximum Depth is typically 24″.

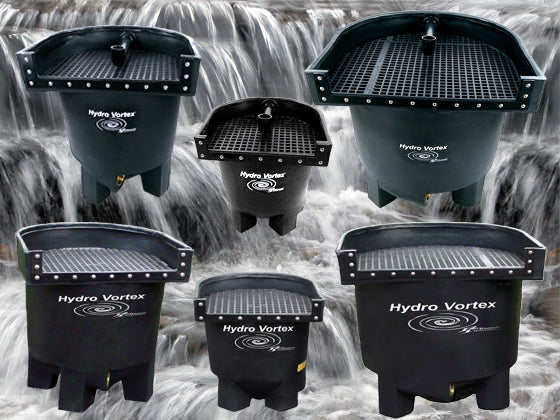
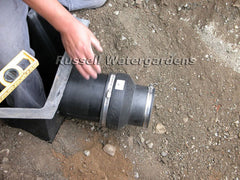
The first step in constructing your water garden pond is to attach the plumbing to the Hydro Vortex™ Easy to Clean Waterfall Filter. All Hydro Vortex™ Filters come complete with PVC pipe adapters, drain pipe, and Fish-Safe Silicone Sealant.
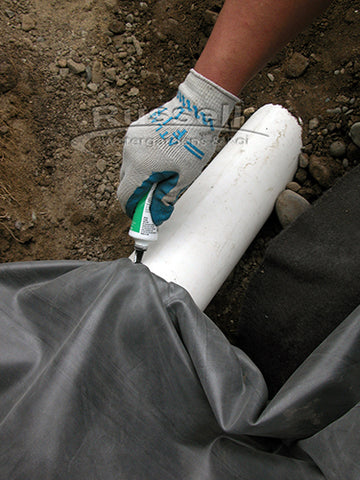
Place a bead of Silicone on the 1½” PVC male pipe adapter for the Clean Out Drain Pipe.
Please note:
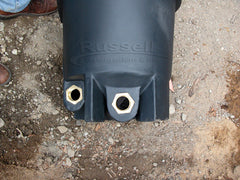
The Ahi Hydro Vortex™ Filter has one 1½” Solid Brass female threaded Inlet Port and matching PVC pipe adapter and one 1½” Solid Brass female threaded Bottom Drain Clean-out Outlet Port and matching PVC Pipe adapter.
Both the Marlin and Dolphin Hydro Vortex™ Filters have two 2″ Solid Brass female threaded Inlet Ports with one 2″ PVC pipe adapter and one 2″ PVC plug. Both units also have one 1½” Solid Brass female threaded Bottom Drain Clean-out Outlet Port and matching PVC Pipe adapter. (The plug may be substituted with a second pipe adapter when dual plumbing main-lines are used.)
You’ll then thread the PVC male pipe adapter with Siliconed threads directly into the Solid Brass Female threads of the Hydro Vortex™ Filter’s Bottom Drain Outlet Port. It is the port in the middle and closest to the bottom of the filter. Thread it in just as tight as you can get it with your hands – no need for a large wrench. Make sure to not cross the threads.
You’ll then repeat the process with a second PVC pipe adapter and thread it into the Hydro Vortex™ Filter’s Solid Brass female threaded Inlet Port.

Using the Purple PVC Primer included with your Custom Water Garden Pond Kit, clean and prime the inside of each of the pipe adapters you just finished attaching to the Hydro Vortex™ Filter.
Next, grab the 1½” x 10′ flexible PVC Drain Pipe that was included with your Hydro Vortex™ Waterfall Filter. Clean one end of it with the Purple PVC Primer. Clean and apply primer all the way around the pipe, and up the pipe about 3″ from the end.
Next, open the can of Red Hot Blue PVC Glue that was included in your Custom Water Garden Pond Kit. Apply the glue all the way around the end of the primed flex pipe. Apply the glue to the same surface area of the pipe as the primer.
Insert the primed and glued flex drain pipe into the Bottom Drain Outlet Port of the Hydro Vortex™ Waterfall Filter. Slightly twist the pipe back and forth as you’re pushing it into the pipe adapter to remove any air bubbles in the glue. Hold the pipe for 60 seconds. The drain pipe is attached first because it is the lowest pipe. The inlet pipe is above the drain pipe. The drain outlet is always at the bottom center of the Hydro Vortex™ filter and perpendicular to the filter’s round side wall. The inlets are always parallel to the filter’s round side wall.
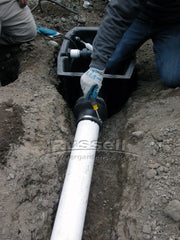
Your next step is to unroll your main-line pipe and extend it from the Hydro Vortex™ Filter to where you will be installing the HydroClean™ Pond Skimmer. Like the drain pipe you previously attached to the Hydro Vortex™ Filter, you will clean and prime the pipe with the Purple PVC Primer then apply a coat of Red Hot PVC Glue to the pipe.

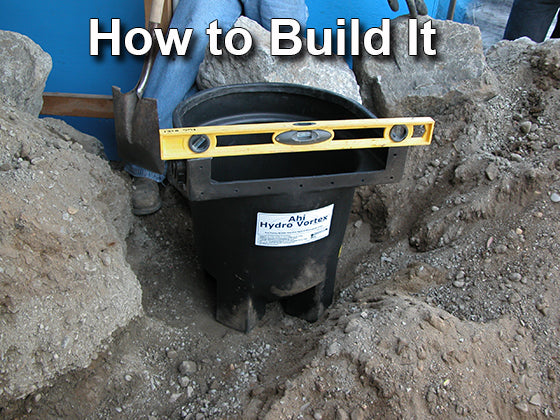
Set the Hydro Vortex™ Easy to Clean Waterfall Filter on firm level soil. If your soil is soft, wet, or high in peat – first place a 4″ thick bed of compacted crushed gravel as a footing. Remember when full of water, the filter will be very heavy – if the filter isn’t set on a firm footing – settling can occur that may cause leaks in the future. Extend the drain pipe out to a waste area, and extend the main-line pipe back towards the HydroClean™ Pond Skimmer.

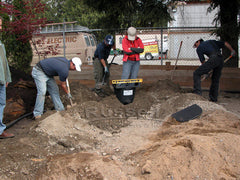
You are now ready to begin excavating the pond. You will use all the excavated soil to cover your mainline pipe, fill around the Hydro Vortex™ Waterfall Filter and to create the stream shoulders.
It's best to excavate your stream down about 3″ – 6″. Build the “shoulders” along each side of the stream up 4″-8″. The shoulders hold your water in, and help keep any ground water run-off out of your system.
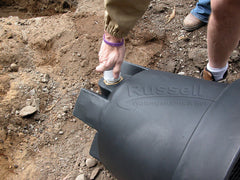
Once the Hydro Vortex™ Easy to Clean Waterfall Filter is set on firm level ground, have someone stand inside it with a level to hold it in place. This is to maintain the filter’s levelness while others surround the filter and cover the pipes with soil excavated from the pond location.
Standing in the filter is traditionally reserved for the “supervisor” of the project.

Compact the soil as it is being placed to ensure uniform compaction from the bottom up. The soil should come up to within 1″ – 2″ of the upper rim of the Hydro Vortex™ Easy to Clean Waterfall Filter.
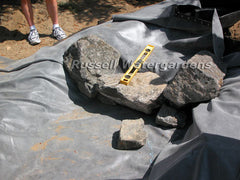
This particular design called for a two-step waterfall – compacted soil is used to construct “steps” that will become footings for the waterfall boulders. The height of the steps are a division of the total height of the waterfalls, in this design, the falls are 2′ high, so one stair step of 12″ is created with soil, the upper fall will be created with the Hydro Vortex™ Easy to Clean Waterfall Filter itself.
To properly estimate the width your “stairs” should be, add the width of the waterfall effect you are creating plus each “shoulder boulder” that the waterfalls will fall between. In this example, the waterfall will be 18″ wide and we’ll have 18″ boulders on each side of the waterfall – so the width of the stair step needs to be 18″ + 18″ + 18″ = 54″ wide.
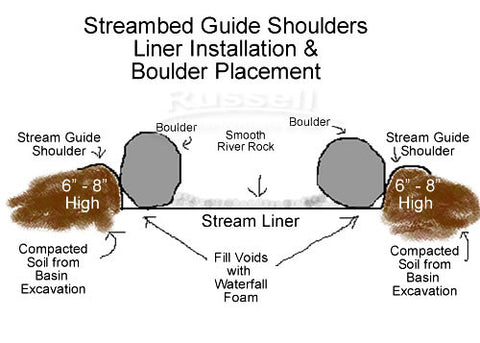
Waterfalls, like streams, need to have “Guides” or “Shoulders” to hold liner above the water line. These “Shoulders” should be at least 6″ – 8″ above each horizontal level of the stair steps.

Rake the excavations as smooth as possible – and remove any sharp rock edges or tree roots.
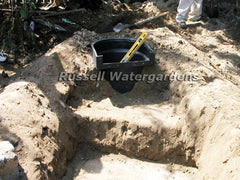
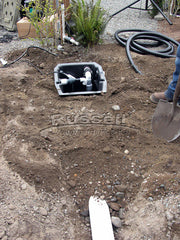
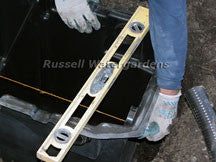
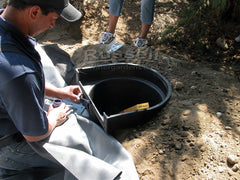
Set the HydroClean™ Pond Skimmer down into the skimmer hole excavation and check its levelness. If the skimmer is not level front to back and side to side – remove it from the hole and rake and compact the soil until the skimmer sits in the hole level.
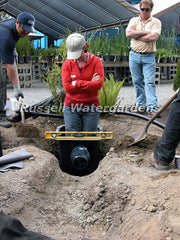
Just as you previously installed the Hydro Vortex™ Waterfall Filter, have the “project supervisor” stand inside the HydroClean™ Pond Skimmer to maintain its levelness while others backfill with soil. Backfill the rear and sides of the skimmer.
!!! DO NOT BACKFILL THE FRONT OF THE SKIMMER YET !!!
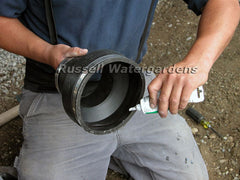
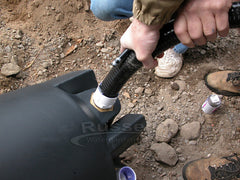
With the HydroClean™ Pond Skimmer level side to side and front to back and backfilled with soil, you’re now ready to attach the remote installation pipe. Using Fish Safe 100% Silicone Sealant included with your HydroClean™ Pond Skimmer, apply a solid bead of Silicone around the inside edge of the rubber coupler that will join to the skimmer’s inlet pipe.
Make sure the inside of the rubber coupler and the outside edge of the HydroClean™ Pond Skimmer’s inlet pipe are clean and dry prior to applying Silicone. Use the Purple PVC Primer supplied with your Custom Water Garden Pond Kit to pre-clean these surfaces.
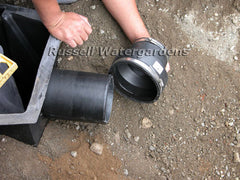
Whether you’re installing a straight rubber coupler, or a reducing rubber coupler – install it so that the Stainless Steel Nut is near the top for easy access.

Now apply another bead of Silicone inside the other end of the rubber coupler.
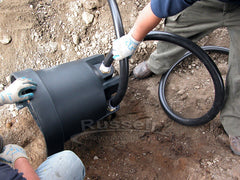
With the skimmer remote installation pipe installed, you can now tighten the Stainless Steel Nuts of the Stainless Steel clamps to lock it all in place.

Level the skimmer's remote installation pipe.
Backfill the skimmer's remote installation pipe.
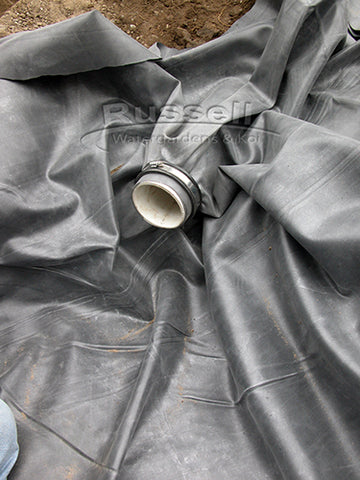
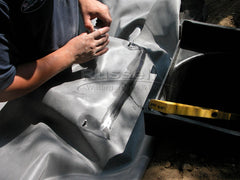
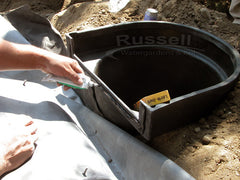
With the HydroClean™ Pond Skimmer and its remote installation pipe installed, you’re now ready to install the underlayment down into the pond excavation. Tuck in the corners, smooth out all the wrinkles you can, and fold over the remaining wrinkles.
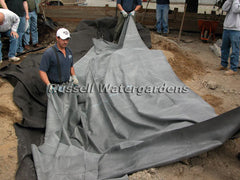
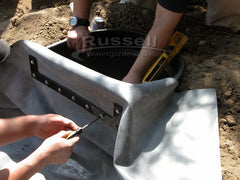
With the underlayment installed into the pond excavation, you’re now ready to install the pond liner. Tuck the liner into all corners while leaving 2″-4″ extra at the base of each shelf as expansion joints. Then smooth out as many wrinkles as you can and fold over the remaining wrinkles.
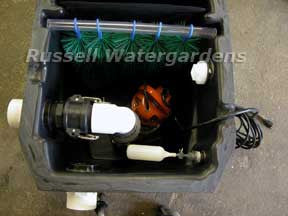
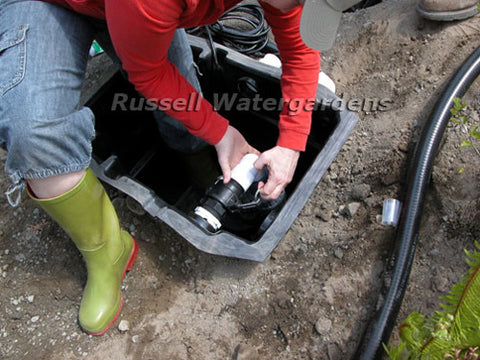
Your Ultimate Water Garden Pond Kit comes with a HydroClean™ Pond Skimmer. All HydroClean™ Pond Skimmers have 3 Interchangeable Outlet Ports – one of which will be plumbed as the Overflow. They are all at the same height inside the skimmer’s body. The pond's water line will be measured from the bottom of the Overflow Outlet Port.
This photo on the right is showing a pump plumbed to the Outlet Port on the left, a plug in the Outlet Port on the right, and the rear Outlet Port ready to be plumbed to an Overflow pipe. Also, the optional Automatic Water Fill Valve is installed it its own Water Inlet Port.
Hold a string level at the bottom of the Overflow Outlet Port, extend it out of the HydroClean™ Pond Skimmer through the Inlet on its front side all the way across the pond. When the string is level – paint a mark on the side of the pond at the end of the string. That painted mark will be the pond’s water line. You can then make other string line measurements from that painted mark.
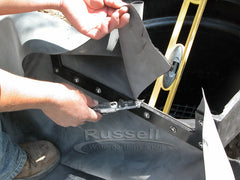
With you liner installed in your pond excavation hole, you’re now ready to attach the liner to your HydroClean™ Pond Skimmer’s Remote Installation Pipe.
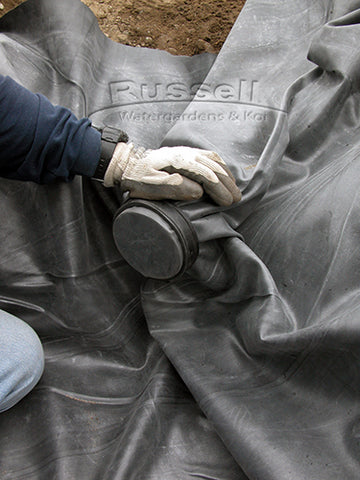
Clean the end of the pipe and the backside of the pond liner with your Purple PVC Primer.
Fold the liner around the end of the pipe, pull out the wrinkles, then place the rubber collar over the liner and pipe end.
Apply a bead of Silicone around the outside end of the pipe.

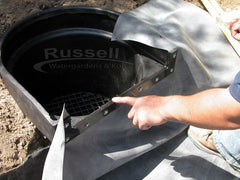
Cut a hole in the liner in the center of the pipe end equal to 1/2 the diameter of the pipe. A 4″ pipe would have a 2″ hole, 6″ pipe – a 3″ hole, and a 10″ pipe would have a 5″ hole cut.
Holding the rubber collar in place, push the pipe through the hole cut in the liner – or pull the liner and collar back over the pipe. The liner will stretch tight around the pipe.
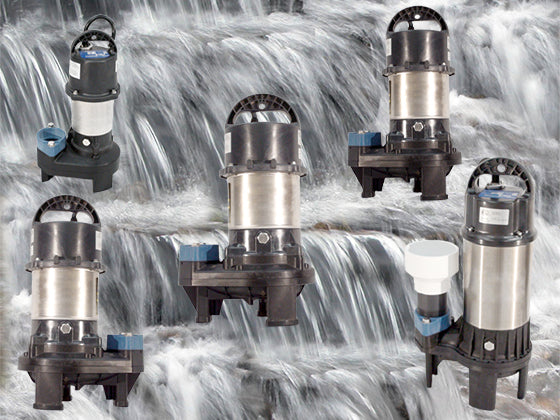
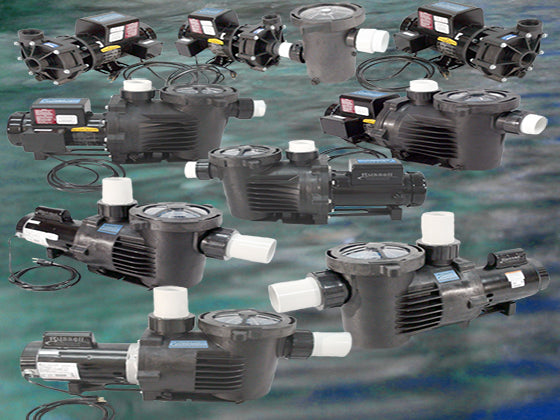
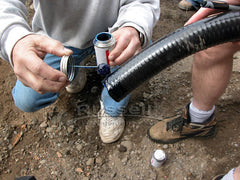
Your next step is to attach the check valve assembly (CVA) to your pump. Simply thread the CVA to the pump’s discharge port.
!!! DO NOT USE SILICONE OR GLUE TO ATTACH THE CVA TO THE PUMP !!!
The check valve will keep the plumbing from leaking. (You’ll need to be able to disconnect the CVA from the pump at some point in the future.) Use silicone or pipe tape on the skimmer/CVA joints.

Attach your pipe to the HydroClean™ Pond Skimmer the exact same way you previously attached pipe to your Hydro Vortex™ Waterfall Filter. Prime the outside of the pipe, and the inside of the pipe adapter with your Purple PVC Primer – then apply your Red Hot PVC Glue to the outside of your pipe. Push the pipe into the pipe adapter while gently twisting back and forth to remove any air bubbles. Hold the pipe in place for 60 seconds.
Repeat the process for your Overflow pipe. The overflow pipe is usually the “left-overs” from what was cut off your main line pipe – unless you order extra pipe with your water garden pond Kit.

With the liner attached to the HydroClean™ Pond Skimmer and/or its Remote Installation Pipe, you’re now ready to start installing your rock.
Before “rocking-in” your pond, make sure that there are no “tight-spots” in the liner that might tear when rocks are placed. Make sure each stair (or level) in the pond has at least 2″-4″ of excess liner at the bottom as expansion joints.
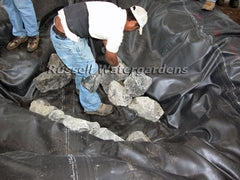
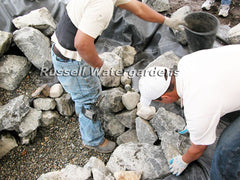
When “rocking-in” a water garden pond, you’re essentially building rock retaining walls. Start at the bottom and work your way around and up. Make sure that no sharp edges on the rocks point towards the pond liner or a puncture may result.

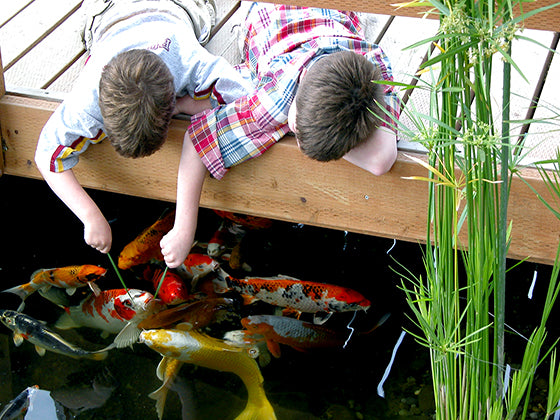
Since a water garden pond is relatively shallow – at only 24″ deep at its maximum – you’ll need to construct “Fish Condos” or caves in your rock walls as hiding places for your fish.
You can’t have too many Fish Condos in your water garden pond! Your fish will thank you.

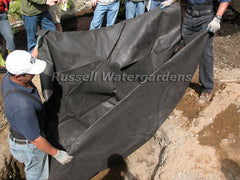
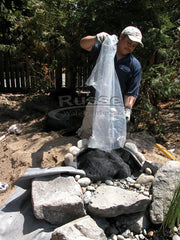
Here’s a tip that will help you move rocks and boulders more easily. Use a piece of underlayment doubled over itself as a sling. Roll a rock onto the the underlayment, and with two or more people, pick up the corners of the sling. As you lift the underlayment it will lift the rock and/or give you a way of sliding the rock around. Make sure your sling is wide enough so that the rock or boulder won’t roll out!
Always use proper “heavy-lifting” practices – lift with your legs and not your back and wear proper lifting gear.
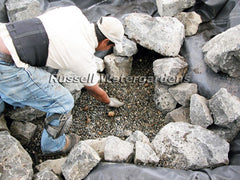
Once all your vertical rock walls and Fish Condos are complete, you’re now ready to add pea gravel to the horizontal surfaces.
When building a water garden pond, we recommend using mostly 3/8″ pea gravel as the gravel layer instead of the 2″ – 8″river rock that is used in the stream and perimeter of the pond. Simply put, there are much less void spaces in pea gravel that can trap debris. A layer of river rock will have large voids between the individual stones that will trap debris – and make it much harder for you to clean and keep clean. Pea gravel has much smaller voids – and thus debris tends to settle on top of the pea gravel layer instead of down in it. This makes for much easier cleaning. A few river rocks may be placed in the pea gravel layer for cosmetic purposes.
Here’s a tip on installing pea gravel. Place the pea gravel in ordinary plastic plant pots that have holes in the bottom. Pre-rinse the pea gravel by running clean water through the pot until the water running out of the pot’s holes is clear. Now you’ll have relatively clean pea gravel inside a plant pot. The plant pot will then double as an easy way for you to pour it onto the horizontal surfaces of your water garden pond.

If you chose to purchase an Underwater Light Kit with your Custom Water Garden Pond Kit, now is the time to install the light fixtures. HydroStone™ Lights simply sit directly on the horizontal surfaces, while HydroLights™ and LED HydroLights™ get tucked into your submerged rock walls. Make sure to leave enough wire coiled up behind the light fixture so that you may lift it out of the water to change the bulb! Run the remaining wire out of the pond and connect it to your low voltage transformer.

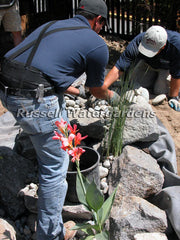
With your submerged rock retaining walls, fish condos, pea gravel, and underwater lights installed – you can now add your aquatic plants.
Since a water garden pond contains pea gravel – you’ll be planting your aquatic plants directly into the pea gravel. Remove the plant from its pot and rinse off the majority of the plant's mud and soil from the roots. Part the pea gravel where you want a plant. Spread the plant’s roots out onto the liner. Push the gravel back over the plant roots and you’re done!
Make sure you plant lilies on the lily shelf and marginal plants on the marginal shelf. You can now begin filling your pond!
!!! DO NOT CUT OFF EXCESS LINER YET !!!
ONLY CUT OFF EXCESS LINER WHEN THE POND IS FULL AND YOUR PUMP IS RUNNING !!!
While the pond is filling with water - use this time to attach the liner to the Hydro Vortex™ waterfall filter. First, pull back the liner from overlapping the filter. Using the Purple PVC Primer included with your pond kit, clean the entire flat “U” shape face of the Hydro Vortex™ waterfall filter.

Place the liner back up and over the filter’s face – smooth out any wrinkles. Place the filter’s Liner Gasket Flange (flat “U” shaped plastic piece with screw holes in it) up to the face of the filter with the liner in between. Poke a screwdriver or awl through the upper corners of the Liner Gasket Flange and matching screw holes of the Hydro Vortex™ Filter. The liner will be pierced in the middle. Leave the screw drivers or awls in place. They will be used to temporarily hold the Liner Gasket Flange to the Liner.
Clean the entire area that the Liner Gasket Flange outlines – from screwdriver to screw driver. Let it dry for 60 – 120 seconds.
Purple PVC Primer stains whatever it touches – so don’t get it on any clothes that aren’t purple – and don’t set the can down on anything you don’t want purple.
With the liner and face of the Hydro Vortex™ filter previously cleaned with the Purple PVC Primer – and the Primer dry – you’re ready to apply Silicone to the filter.
Using the 100% Silicone Sealant that came with your Hydro Vortex™ filter, apply a solid ½” thick bead of Silicone completely across the “U” shape face of the filter. Make sure the bead is unbroken and runs through the center of every screw hole on the Hydro Vortex™ Filter’s face. Remember, wherever there is a gap in the Silicone – it could become a leak! So make sure there are no gaps in the Silicone bead!

With your solid, un-broken bead of Silicone across the face and in the screw holes of the Hydro Vortex™ filter – you’re now ready to attach the liner.
Lift the Liner Gasket Flange, Liner, and Screw Drivers as one piece and insert the screw drivers through the upper most corner screw holes of the Hydro Vortex™ Waterfall Filter. Smooth out any wrinkles between the filter and the Liner Gasket Flange.
Place one Stainless Steel Washer on each Stainless Steel Screw and push it through the Liner Gasket Flange, Liner, and screw hole of the Hydro Vortex™ Filter. Place one Stainless Steel Nut without a washer on the end of the screw on the inside of the Hydro Vortex™ Filter. Do NOT tighten the screws until ALL screws are installed. You may need to slightly shift the Liner Gasket Flange to insert all the screws.
!!! DO NOT FULLY TIGHTEN SCREWS UNTIL ALL SCREWS ARE INSTALLED !!!

Once all the Stainless Steel Screws with Stainless Steel Washers are installed, and each screw has a Stainless Steel Nut attached on the inside of the Hydro Vortex™ Filter, you can tighten each of the screws.
With all the Stainless Steel Screws fully tightened – you may proceed with cutting the liner out of the waterfall opening.
Using a razor knife, use the Liner Gasket Flange as your guide. Cut only the inside of the waterfall opening – do not cut the liner sticking up over the filter’s corners or any other liner at this time.
!!! DO NOT CUT ANY LINER OUTSIDE OF THE LINER GASKET FLANGE AT THIS TIME !!!
With the liner cut out of the Liner Gasket Flange ONLY – smooth out the Silicone bead between the Gasket Flange, Liner, and Hydro Vortex™ Easy to Clean Waterfall Filter.
Notice the liner is un-cut outside of the Hydro Vortex™ Filter’s Liner Gasket Flange.
This allows you to see any low points in the liner that may cause a leak, and it lets you see exactly where the water line is so that you don’t accidentally cut the liner to short!
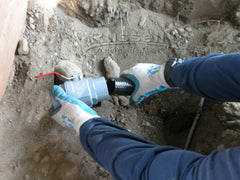
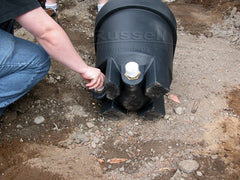
With the Liner attached to the Hydro Vortex™ Filter and the Silicone drying – it's time to install the Stainless Steel Lever Ball Valve on the filter’s clean-out line.
Using the Purple Primer and Red Hot PVC Glue that was supplied with your pond kit, as before – attach the Lever Valve so that it is on its side. Note the water directional arrow on the valve’s body. With the valve open, the Lever should be “in-line” and parallel with the pipe and pointing in the direction of the water flow – in this case, away from the Hydro Vortex™ filter. With the valve closed, the Lever should be pointing towards the sky and be perpendicular to the pipe.
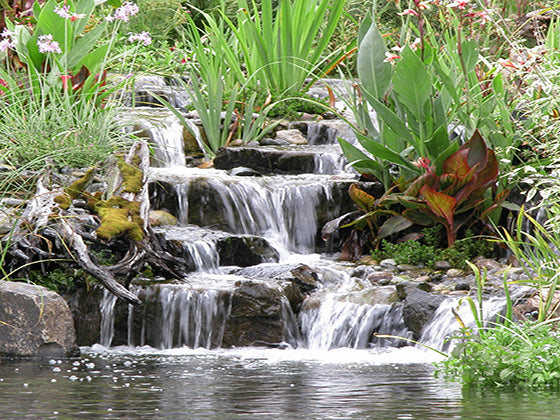
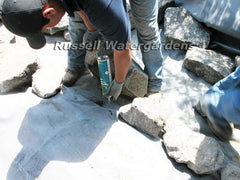
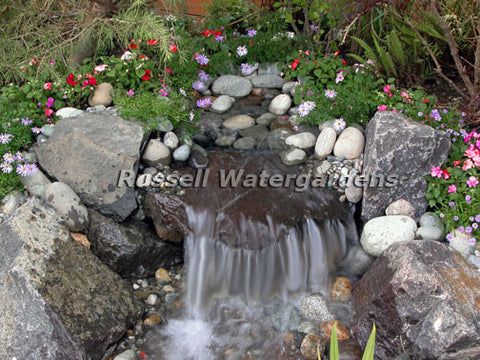
You’re now ready to begin construction of your waterfalls. The most natural looking waterfalls are those constructed using boulders. More “formal” looking waterfalls are constructed using cut stone or slate. The choice is yours. In this example, we’re using 1-man sized basalt boulders. Start with placing your “shoulder-boulders” on each side of your waterfall step – then place your waterfall boulder between the shoulders. Make sure the boulder is as level as you can get it. Use smaller boulders, pebbles, and/or river rocks as shims under your waterfall rock to hold its position. They will all get “glued” together later with the waterfall foam.

Construct you waterfalls from the bottom-up. In other words, start from you lowest stair step, then build each fall on top of the other.
Use smaller boulders, pebbles, and/or river rocks as shims to hold your waterfall rocks in position until you're ready to “foam” them all in.

Before foaming your waterfall rocks in place, hand place clean and dry river rock stones in the gaps behind, below, and in between your waterfall boulders. This will take up space to allow you to use less waterfall foam. The foam will also bind the stones, boulders, and liner all together.
With all your boulders “dry-set”, you can now lock them all in place with your waterfall foam. Using waterfall foam is like squirting whipped cream from a can – it's fun!
Fill all voids under and behind all waterfall boulders, and any boulders in your stream that you don’t want water to run under or behind. Don’t worry if you squirt too much foam – wait until it's dry – then simply tear off any extra that you don’t want.
!!! Don’t try to remove wet waterfall foam – you’ll only make a mess!
It's easier to remove excess foam when it is fully dry by tearing it or peeling it off !!!
Plant bog and marginal plants directly into the gravel mixture after rinsing off most of the soil from the roots.
Marginal plants can be planted anywhere in the stream. Bog plants should be planted behind the edge boulders so only their "feet" touch the water.
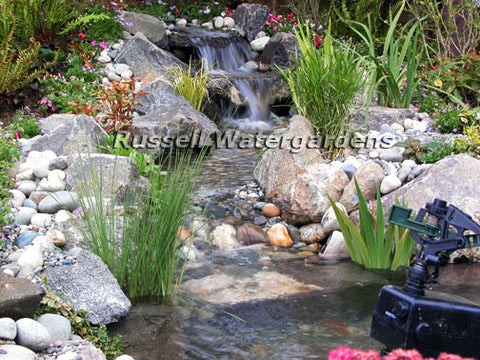
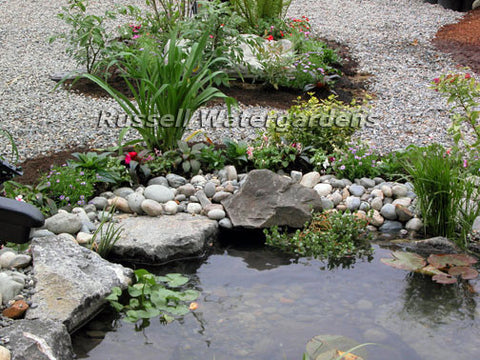
A unique feature of the HydroClean™ pond skimmer is it's ability to be installed away from the pond for a more natural looking pond.
To disguise the skimmer's inlet pipe - place boulders, the gravel mixture, marginal and bog plants on and around the pipe. No one will be able to see that you have a skimmer on your pond!
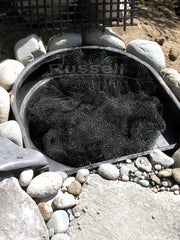

A unique feature of the Hydro Vortex™ filter is its top grate.
The grate does two things: Holds the Hydro FilterSilk™ biomedia in place and provides a surface to place stones to completely hide the filter. Like the HydroClean™ pond skimmer - no one will see that you have a biofilter on your pond! All anyone will see is a beautiful pond and waterfall.
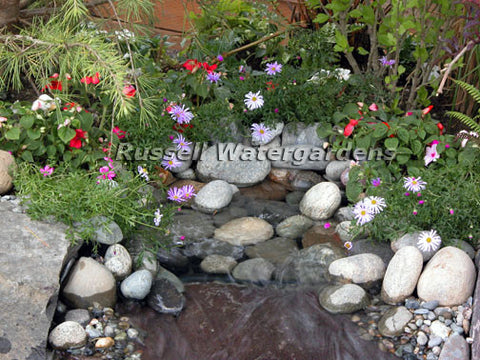
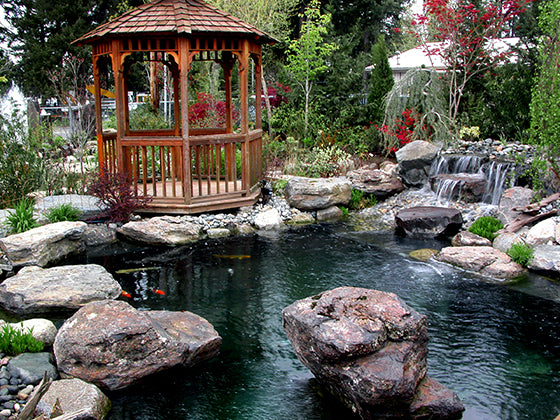
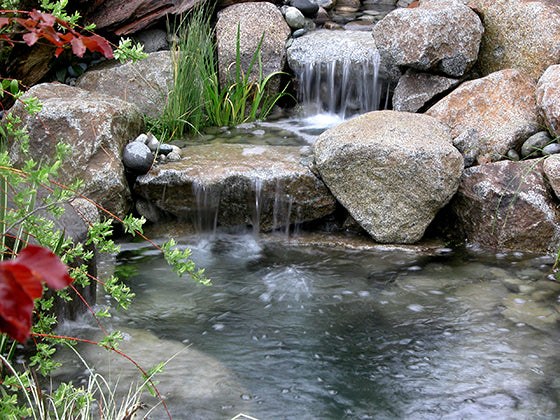
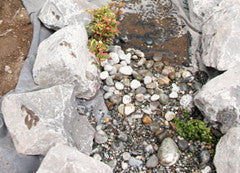
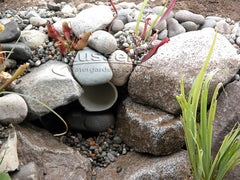
Hydro Vortex™ waterfall filters completely hide from view. All you see is a clean “spring of water” emanating from decorative river rock.
The Hydro Vortex™ waterfall filter is completely invisible. No one will know you have a biofilter!
Can YOU see the filter? The Hydro Vortex™ waterfall filter hides from view and is easy to clean!
Hydro Vortex™ means:
"Beautiful Waterfalls and Clean Water"
Only cut the excess liner AFTER the pond is full and the pump is running! Leave 6"-8" of liner everywhere around the pond and stream. Simply roll or fold the extra liner under itself and cover it with the gravel mixture.
Leaving this extra liner will give you some security if the ground shifts or settles over time. A big mistake many pond builders make is cutting the liner too short - then at some point in the future when the ground shifts or settles - a leak is created! If you have extra liner - all you have to do to fix the leak is unroll the liner above the leak point and compact soil behind the liner. If you don't have extra liner - you have a much bigger job of fixing the leak!
Can you see the HydroClean™ pond skimmer on this pond? It's 10' away behind some landscaping. No other pond skimmer attaches to pipe for remote installation.
The skimmer and the skimmer inlet pipe are completely hidden from view. This makes for a much more natural looking water garden pond.

You just learned how to build a water garden pond! You used state-of-the-art filtration that becomes invisible!
Don't hesitate to call or email us with any questions your help you may need. We're here to serve you.